Blog
Blog

This one’s for anyone who has run out of air halfway through a sentence, heard a gasp on playback, or finished a session with a tight, tired throat. Breathing is the least glamorous part of voice acting and the one that quietly decides how everything else sounds. The good news is that it’s a skill, not a gift, and you can train it at the kitchen table in about ten minutes a day.
Below you’ll find what the voice clinics actually say about breath and the voice, a simple routine borrowed from speech therapy, how to plan your breaths on a script, and what to do with the breaths that end up in your recording.
Your voice runs on air, not on your throat
It’s tempting to think of the voice as something that happens in the neck. The people who treat voices for a living see it differently. The speech-language pathology team at the University of Mississippi Medical Center puts it plainly in their patient handout: “The power or driving force behind our voice comes from breathing and airflow.” They compare air to fuel, calling it the “gas” that makes the voice go.
The same handout explains what happens when the fuel runs low: “When we don’t have good breath support we create tension within our voicebox. This ultimately leads to strain, laryngeal tightness, and poor voicing.”
That’s the whole case for breath work in two sentences. If the air isn’t doing the job, the small muscles around your larynx try to do it instead. You hear it as a pinched, pushed tone at the end of long lines. Your throat feels it as fatigue at the end of the day. If you’ve read our guide to looking after your voice between sessions, this is the other half of the story: hydration and rest protect the instrument, and breath is how you play it without forcing.
What “breathing from the diaphragm” really means
You’ve probably been told to breathe from your diaphragm. It’s good advice with a confusing name, because you can’t actually feel your diaphragm. Here’s what’s going on.
Cleveland Clinic describes it this way: “The diaphragm is the most efficient muscle for breathing. It’s a large, dome-shaped muscle located at the base of your lungs.” When you breathe in, that dome flattens and pulls downward, which makes room for the lungs to fill. Your belly and lower ribs move outward because the organs underneath get nudged out of the way. So the movement you feel in your stomach is the sign that the diaphragm is working, not the muscle itself.
The opposite habit is breathing high in the chest, shoulders creeping up toward your ears. The Mississippi handout calls this out directly: “People often get into a habit of tightening their chest and shoulders when they breathe, instead of relaxing those muscles and filling the low belly up with air.” Chest breathing gets you a quick sip of air but not much of it, and it brings tension into the neck, which is exactly where you don’t want it when you’re trying to sound relaxed.
Breathing out matters just as much. Cleveland Clinic notes that “Your abdominal muscles help move the diaphragm and give you more power to empty your lungs.” For a voice actor, that steady, controlled release is what carries a long line to the end without the last few words fading or tightening.
The clinic routine, adapted for the booth
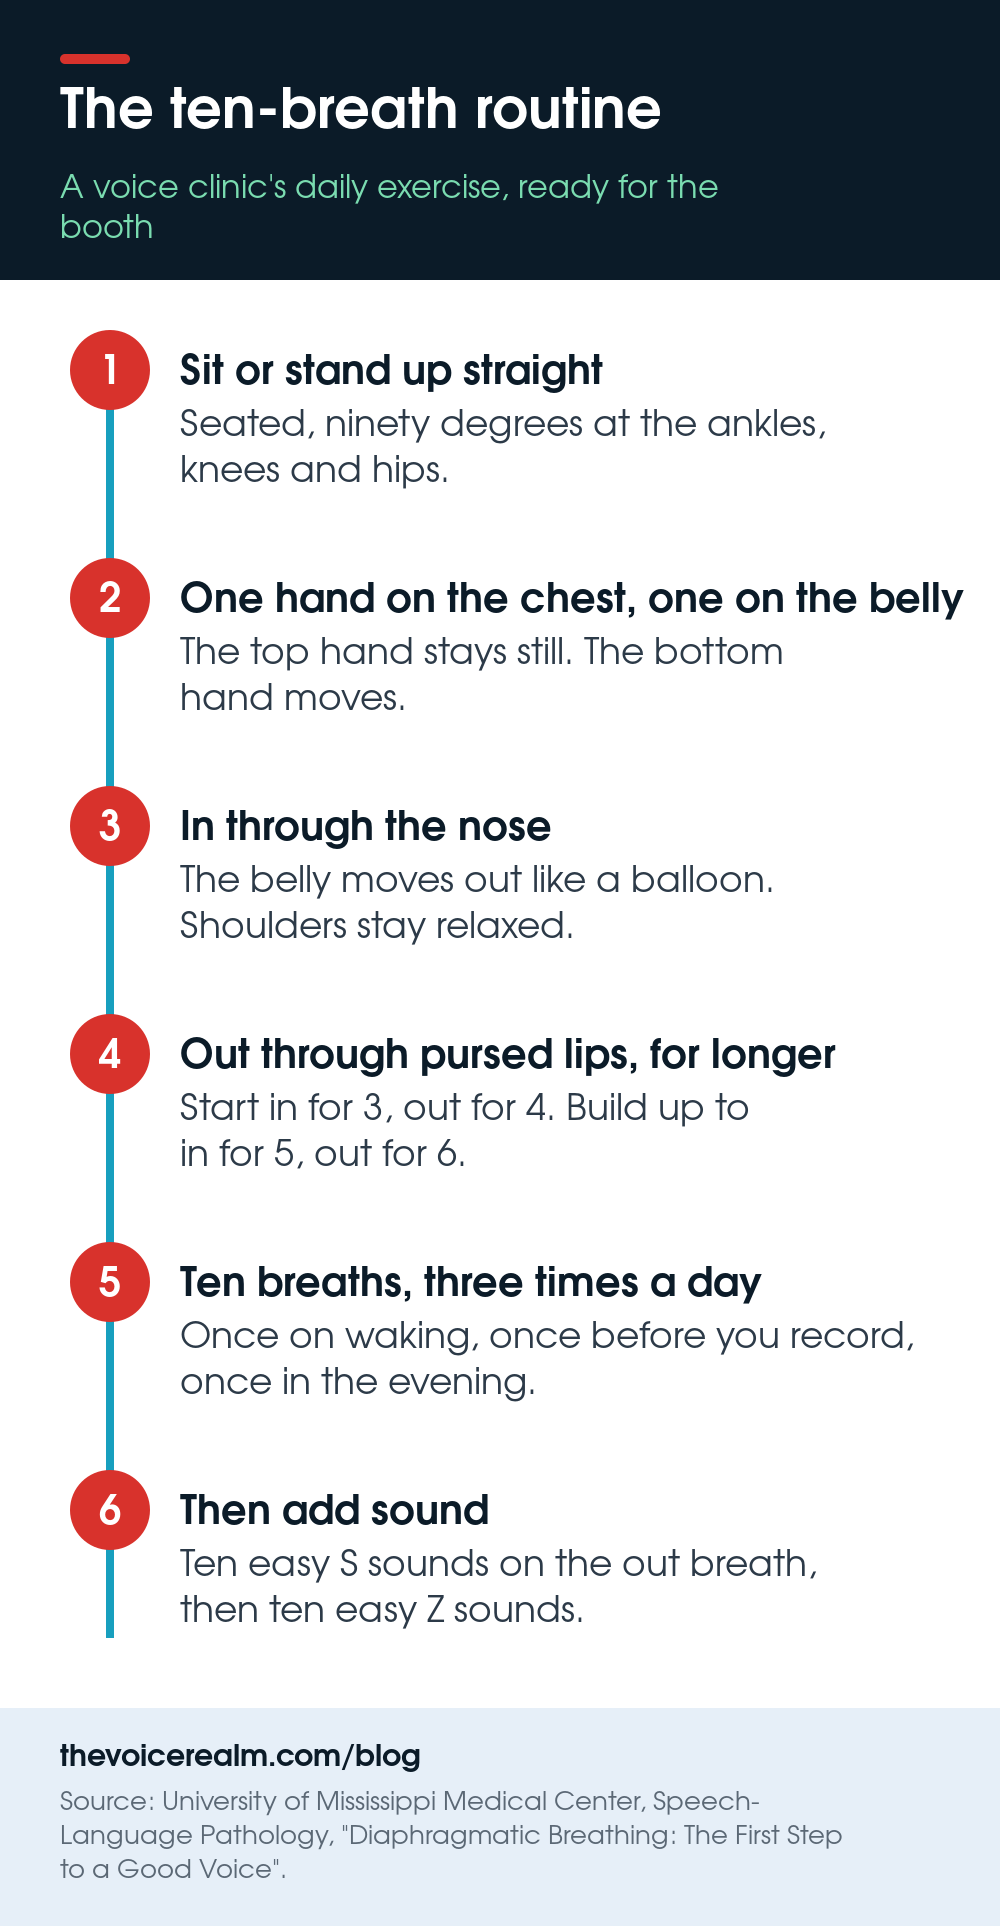
The Mississippi team gives a short daily exercise that works just as well for voice actors as for their patients. Here it is, step by step, with a note on how to use it before a session.
1. Start with posture. The handout says to “Sit up or stand up straight” and, when sitting, to remember “ninety degrees at the ankles, knees, and hips.” If you record standing, stand as you would at the mic, knees soft, weight even.
2. Put your hands on the job. One hand on your chest, one on your belly. Your hands are your feedback. The top one should stay quiet; the bottom one should move.
3. Breathe in through your nose. In the handout’s words: “As you breathe in, the stomach should move outward, filling up like a balloon.” You may also feel your lower back widen, which the handout mentions too. That’s a good sign.
4. Breathe out through pursed lips, and take longer. “The goal is to make your exhales longer than your inhales.” Start with in for a count of three and out for four. As it gets easy, stretch it: in for four, out for five, then in for five, out for six.
5. Ten breaths, three times a day. That’s the handout’s prescription, and it’s small enough to fit around a working day: once when you wake up, once before you record, once in the evening.
6. Add sound. After your ten breaths, the handout adds ten easy “S” sounds on the out breath, then ten easy “Z” sounds. The S trains a smooth, even flow of air. The Z does the same with your voice switched on, which is closer to what happens when you read.
Don’t be surprised if it feels like work at first. Cleveland Clinic warns that “At first, you’ll probably get tired while doing this exercise. But keep at it, because with continued practice diaphragmatic breathing will become automatic.” Automatic is the goal. You don’t want to be thinking about your belly in the middle of a read; you want your body to have already learned it.
If you’re just starting out and want a coach to check your technique in real time, the beginner courses at Voice Master Academy cover breath and warm-ups alongside reading copy, which is a quicker route than figuring it all out alone.
© The Voice Realm
Plan your breaths before you press record
Good breath support gets you the air. Planning tells you when to take it. Most breath trouble in a take isn’t a lung problem, it’s a map problem: you started a long sentence on the air you had left from the last one.
 VoiceEditSuiteEleven tools. One browser tab.Auto Clean UpACX PrepStudio RescueSee the toolsBuilt for working voice actors.
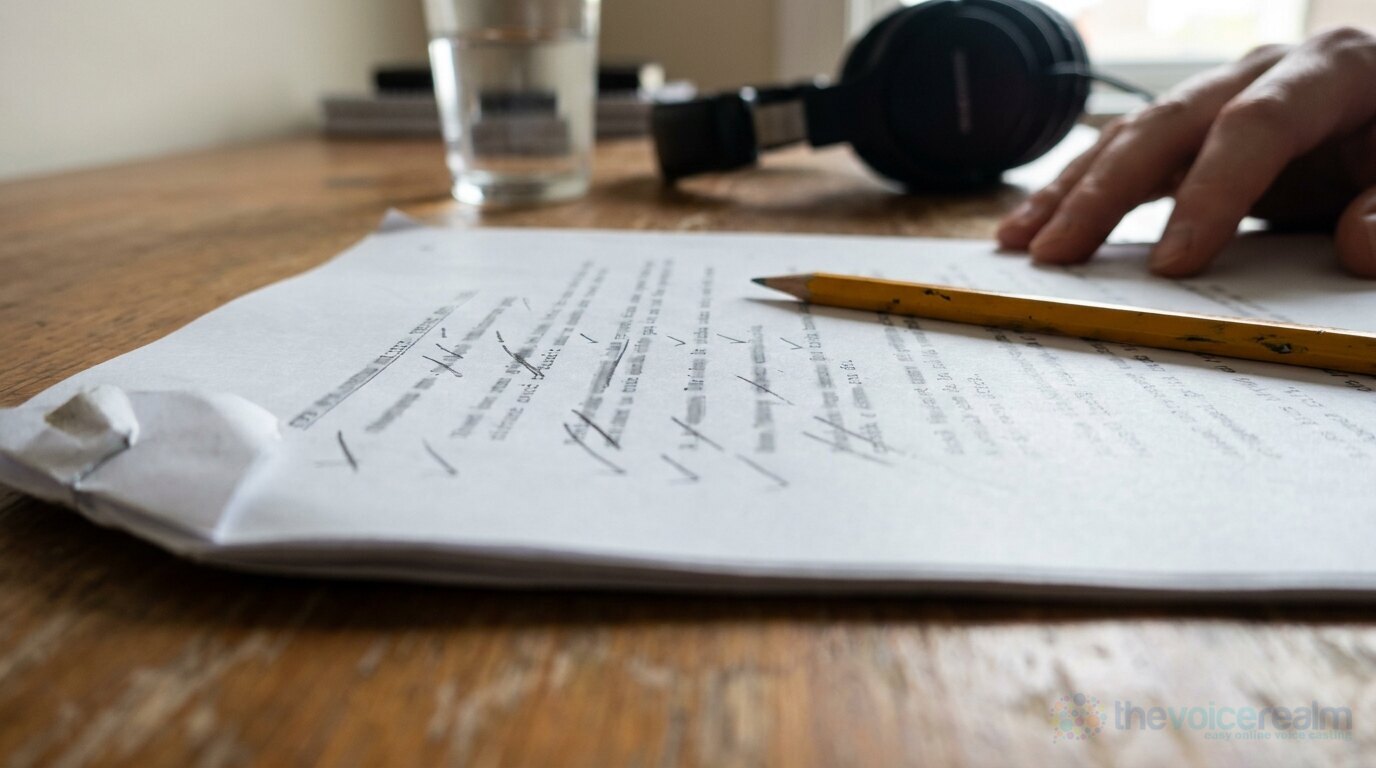
Read the script once out loud before you mark anything. Then take a pencil and do this:
- Mark the thought changes. Put a light slash wherever the idea shifts. That’s where a listener expects a breath, so it’s where yours will sound natural. Punctuation helps, but it isn’t the rule. Plenty of commas don’t need a breath, and some long sentences need one where there’s no comma at all.
- Find the long runs. Any line that feels too long on the first read gets a small tick where you can top up with a quick, quiet breath if you need to.
- Breathe before the important word, not after it. A fresh breath just before the key phrase gives it energy. Running out of air on the product name or the punchline is the one you’ll hear back.
- Never start on empty. Take the next breath before you’re out, not when you’re out. Reading down to the last drop is what makes the end of a line go thin and tight.
Timed copy makes this even more important. In a thirty-second spot you can’t afford a slow, heavy breath between lines, so you plan small ones and you place them where the copy already pauses. Long-form work is the reverse: over a whole chapter, your breathing becomes part of the rhythm the listener settles into.
© The Voice Realm
Quiet breaths sound better on the mic
A breath you can barely hear in the room can sound like a gust of wind in headphones, because a good microphone picks up everything. A few habits keep them gentle:
- Keep your mouth slightly open between lines. Snapping the lips shut and opening them again adds clicks and a sharp intake. Relaxed, slightly parted lips make for a softer breath.
- Breathe low and slow, not fast and high. The belly breath you practised is also the quieter one. A hurried chest breath is the gasp you hear on playback.
- Turn your head a little for a big breath. If a line needs a full breath, many voice actors turn slightly away from the mic to take it, then come back to the same spot to speak.
- Drink water, and keep it by the mic. A dry mouth adds noise to every breath. Sip between takes, not in the middle of a line.
Should you cut the breaths out?
It depends on the job, and it’s one of the most common questions from people new to editing. The audiobook guide site Narrators Roadmap draws the line clearly. For short-form work, it says, “Breaths are routinely removed in other voice work such as animation and commercial voiceover.” In commercials, that makes sense: the clock is fixed and every tenth of a second counts.
Long-form is different. The same page says “Hearing an audiobook without breaths feels unnatural and even robotic to the listener,” and describes the standard approach this way: “The audiobook industry standard approach is to leave breaths in the audiobook but make adjustments to some breaths in post-production.” Loud or gasping breaths get turned down or removed; the rest stay, because they carry pace and feeling. If you’re thinking about narrating a whole book, that’s worth knowing before you start deleting.
For e-learning, explainers and corporate narration, most people land somewhere in between: breaths stay, but they’re softened a little so they don’t compete with the words. Whatever you choose, be consistent across the project. A file where some breaths are gone and others are loud sounds stranger than one where they’re all left in. There’s more on handling this cleanly in our editing pass order.
The better your breathing in the booth, the less of this you’ll have to do. A quiet, well placed breath rarely needs touching at all.
Breath is also how you handle nerves
Auditions, live-directed sessions and that first paid job all have one thing in common: your breathing speeds up and climbs into your chest before you’ve said a word. Slow belly breathing is the fastest way back. Cleveland Clinic lists the benefits of the technique as “reducing your blood pressure and heart rate and improving relaxation.” That’s a medical description of something every voice actor feels: two or three slow breaths before you hit record, and your voice sits lower and steadier.
Try it before your next audition. Hands on chest and belly, in for four, out for six, three times. Then read.
A one-week plan to make it stick
You don’t need a month of drills. You need a week of small, regular practice so your body stops treating it as something new.
- Days one and two: The clinic routine three times a day, lying down if it’s easier to feel the movement. Cleveland Clinic suggests starting on your back with your knees bent.
- Days three and four: Move to sitting, then standing at your mic position. Add the S and Z sounds. Record one minute of yourself reading at the end of each day.
- Day five: Take a script you’ve already recorded and mark it up with slashes and ticks. Re-record it and compare the two takes side by side.
- Days six and seven: Read something long, a chapter or a ten-minute module. Listen back only for breaths: are they quiet, are they where you planned, did you ever run out?
By the end of the week you should hear fewer gasps, fewer tight endings and a voice that stays fresher at the end of the session. When you’re ready to put it to work, the voice over jobs board is a good place to find copy of every length to practise on.
The short version
Air does the work so your throat doesn’t have to. Breathe low, let the belly move, keep the shoulders still, and make your out breath longer than your in breath. Plan your breaths on the page before you read, take them before you need them, and keep them soft on the mic. Leave natural breaths in long-form work and tidy the loud ones. Ten minutes a day is plenty. Your voice will thank you by lasting longer and sounding easier, which is exactly what clients are listening for.
Sources: University of Mississippi Medical Center, Speech-Language Pathology, “Diaphragmatic Breathing: The First Step to a Good Voice”; Cleveland Clinic, “Diaphragmatic Breathing Exercises and Benefits”; Narrators Roadmap, “Should I remove breaths from my audiobook?”. Photographs are illustrations. This article is general guidance, not medical advice; if you have ongoing hoarseness or breathing problems, see a doctor.
Ready to get booked?
See the jobs open right nowAbout Sarah Robbins
Sarah Robbins writes for The Voice Realm about finding voice over work, home studios, casting and the business side of voice acting.