Analog to Digital – Choosing a Voice Over Microphone

Now let’s get into the technical weeds. Over the next few posts we’ll talk about how to get your golden voice out of the real world and into your computer. We’ll discuss your options for selecting a microphone and the recording accessories you may need to get the best sound. We’ll talk about how to select and use software for recording and editing, and then we’ll talk about editing and applying just enough audio effects to make your voice sparkle. Finally, we’ll wrap up this particular series with some ideas about streamlining your workflow so that you can spend less time recording and editing… and more time running your voiceover business.
Ready? Let’s go!
Choosing a Microphone
Microphone selection is a big and frequently controversial topic. Microphones come for a dizzying range of prices, from the microphone in your mobile phone to legendary studio microphones that cost many thousands of dollars. You may someday want to visit an actual music store and audition microphones for yourself, but I think any of the microphones below are solid choices for a new voiceover artist to start with. For now, focus on improving your deliverables with better technique, not more expensive technology. Here are three affordable microphones I like among the dizzying array of choices:
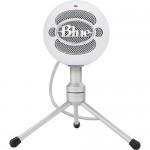
Blue Snowball iCE can be had for under $45. It has a USB interface, so you can skip (for now) the complexity of extra cables, preamps, and stand-alone audio interfaces. Take the Snowball iCE out of the box, set it on its included stand, plug it into your computer’s USB port with the included cable, and start recording. I’m happy to recommend it to aspiring VO artists: it’s a well reviewed and solid mic at a terrific price.
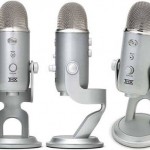
Blue Yeti costs $129. I mention it because it’s extraordinarily well reviewed and because I happen to own one, but depending on your budget I recommend choosing either the Snowball iCE or the Apogee MiC below. The Yeti’s added headphone port doesn’t matter for two reasons. First, your recording software can provide live monitoring; and second, you shouldn’t record with cans anyway. “Lose the headphones and gain the authenticity,” said my favorite voice coach, and I agree. The Yeti has additional features not relevant to a voiceover artist, and also delivers a sampling rate boost–neither of which justifies the additional cost. I have a special fondness for the Yeti because I learned so much with it, but now that Snowball iCE has hit the scene I no longer see a reason to recommend the venerable Blue Yeti.

Apogee MiC 96K, available for $229, packs a great deal of functionality into a very small package. It’s so cute! Like the microphones above, it’s got a built in digital interface, simplifying connections and annoying audiophiles. The MiC has a handy level indicator light that lets you see at a glance whether your audio levels are too low, just right, or too hot, and there’s a dial on the side that lets you make gain adjustments. The MiC delivers a great sound that reviewers like [link], and can supply 24 bit audio, sampled at 96KHz. We’ll discuss bit depth and sampling rate in a future post; for now we’ll simply nod solemnly and agree that that’s a lot of bits and a lot of Hertz.
But my favorite thing about the Apogee MiC 96K is that it comes with two distinct cables: a USB cable for recording into your computer, and a Lightning cable for recording into your iPhone, iPod or iPad. This opens up fascinating possibilities. For example, if you find that you get the best acoustics in the crawlspace under your neighbor’s house, you can wriggle under there with just your Apogee MiC 96K and your iPhone, make your recording (reading your script right off the screen while the recording app works in the background), then transfer the file to your computer for the remaining steps in your process. (My Mac bias is showing here; this microphone isn’t designed for use on Windows computers. At this price the Shure PG42-USB makes for a good alternative.)
Fancy Something More…Expensive? If you have more than a few hundred dollars set aside for a microphone and it’s burning a hole in your pocket, possibilities abound. You’ll probably want to choose a microphone with an analog XLR connection instead of a built-in digital interface. Then you’ll need a separate audio interface that powers the microphone, applies pristine amplification to the microphone’s incoming analog signal, and converts that signal at unimaginable quality to a digital signal that reaches your computer via USB. If I had $500 I needed to spend immediately, perhaps I’d select a Focusrite Scarlett Solo interface and a CAD E100S supercardioid mic. Or maybe a Universal Audio 710TFD paired with the legendary EV RE20 for $1200. At these prices it’s essential to try before you buy, and to be sure that what you’re getting is worth the extra cash. I might spend it on a boat payment instead.
That’s all for now. Next we’ll talk about recording accessories. Pop filters, vocal shields, headphones, speakers, and other gadgets. We’ll also talk about where to record. Can you build your own VO booth in a spare closet for $57.01? Should you? Stay tuned!
Will Irace is a voiceover artist based in Portland Oregon. You can hire him for your next project right here at The Voice Realm. No consideration of any sort was provided by any manufacturer in exchange for the product descriptions in this article. Will tweets as @spblat and does not have a boat.