Blog
Blog

You nailed the read. The pacing’s right, the smile’s in it, and then you play it back and every S comes out like a bag of crisps being opened next to your ear. That sharp hiss has a name, sibilance, and almost every voice actor runs into it sooner or later.
This guide is for anyone recording voice over at home who’s hearing harsh S sounds and wants them gone without ending up with a lisp. We’ll work in the order the pros do: check it’s really there, fix it at the mouth, fix it at the mic, and only then reach for software.
What sibilance is, and why microphones love it
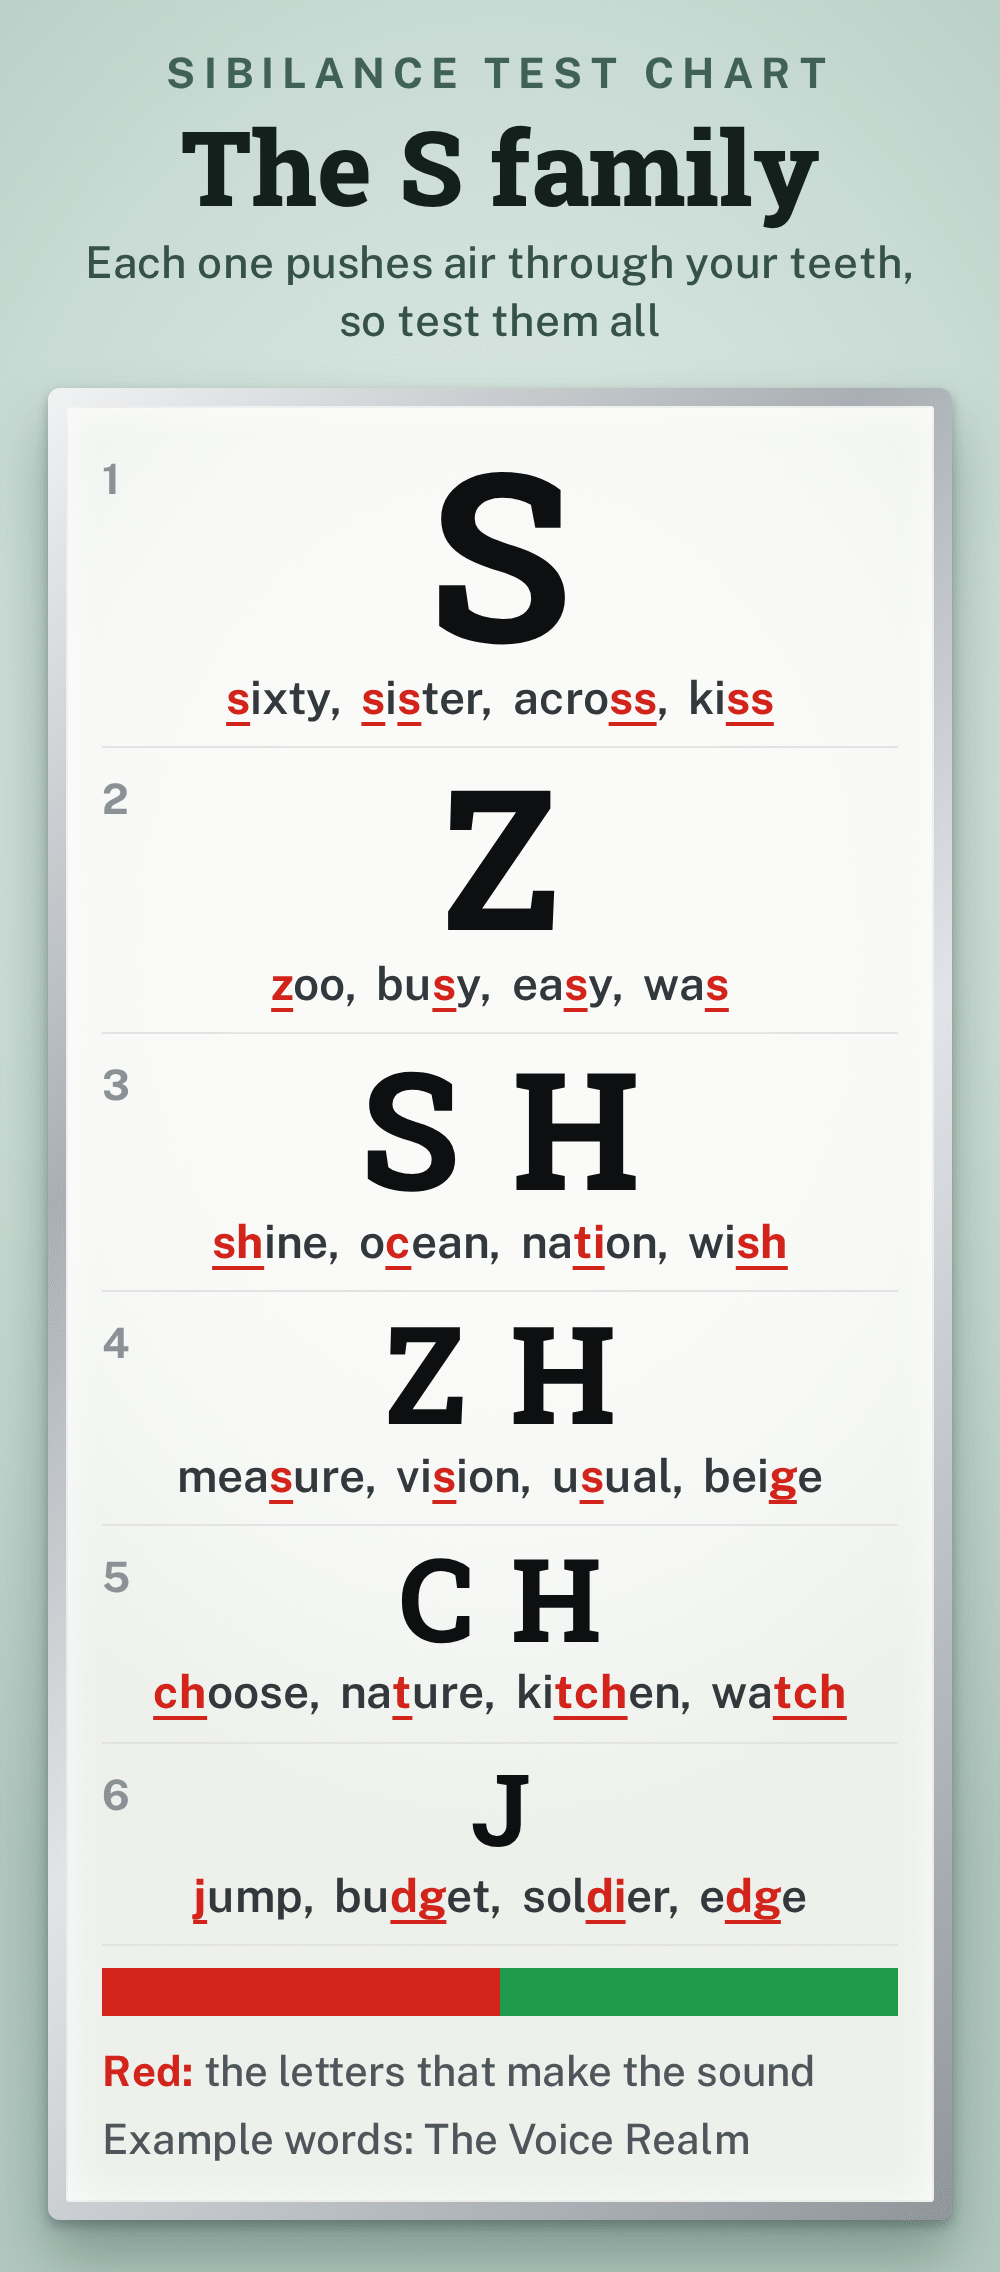
Sibilance is the hissy, whistly energy in the sounds you make by pushing air through a narrow gap at your teeth. The S is the famous one, but it has a whole family of relatives that behave the same way.
A little of it is normal and you need it, or “sixty seconds” turns into mush. The problem is when it jumps out louder than the rest of your voice. Matt Houghton, writing in Sound On Sound, explains why the S is such a troublemaker: “to make any ess or ‘sh’ sound, we force air through our front teeth, which usually means directing a blast of air directly at the mic.”
He also points out that it doesn’t sit in the same place for everyone. “Female voices tend to have higher-frequency esses than male ones,” he writes, and most of the energy lands “in the 3-6 kHz region (where our hearing is relatively sensitive).” That last bit matters. Our ears are tuned to notice exactly the frequencies where an S lives, so a small spike sounds big.
© The Voice Realm
First, make sure you’re actually hearing it
Before you change anything, be sure the problem is in the file and not in your headphones. Jim Edgar, a voice actor and audio coach who runs JustAskJimVO, says the harshest part usually sits “typically between 6 and 10 kHz” and warns that “some headphones or monitor speakers tend to overemphasize upper frequencies.” Laptop speakers, he adds, are “notoriously varied.”
So listen on two or three things: your studio headphones, a pair of everyday earbuds and your phone speaker. If the S only stings in one of them, that’s your listening gear talking, not your recording.
Then record a test line. Jim’s is a good one: “Seven silly simians silently sipped sassafras teas.” Read it at your normal distance and energy, the way you’d read a real script, and play it back.
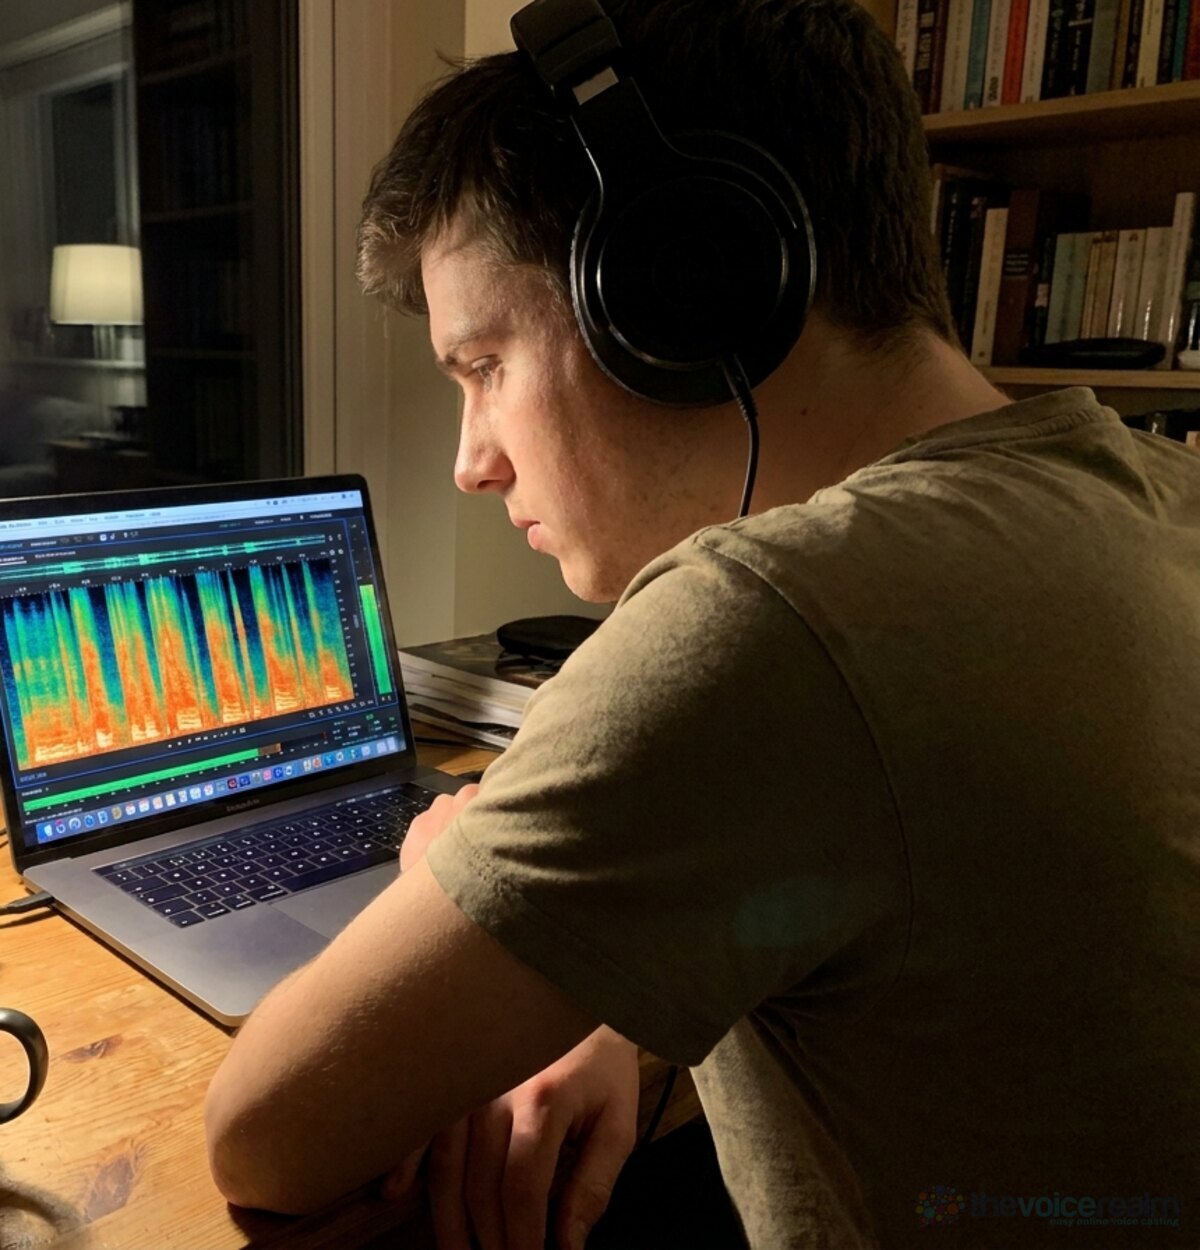
If your editor has a spectrogram view (most do now, and it’s free in Audacity), look at the playback. Speech shows as warm bands low down, and every S shows up as a bright streak near the top of the display. You’ll start spotting them in seconds, which makes the rest of this guide much easier to judge by eye as well as by ear.
© The Voice Realm
The fix starts in your mouth
This is the part nobody wants to hear, because it means the gear isn’t entirely to blame. Some voices are simply more sibilant than others, and it’s often the careful, crisp speakers who suffer most. Jim notes that “those who speak with a bit more precision can find it to be a problem.”
Two habits make it worse, and both are easy to test. “If you draw your lips and jaw tightly when forming that sound, it tends to produce more sibilance,” Jim writes, and “the more you form the sound by pressing your tongue towards the inside of the front teeth, the sharper the ‘S’ becomes.”
Try this. Stand at a mirror and say “sixty six seconds” three ways: your normal way, then with a clenched jaw and tight smile, then with your jaw loose and the tip of your tongue resting slightly lower. You’ll hear the hiss grow and shrink. You’re not trying to change your accent or speak lazily. You’re looking for the gentlest S that still sounds clear.
A few other things nudge it up:
- A gap between your front teeth. Air whistles through it. Houghton mentions singers using a bit of dental wax over the gap as a cheap fix when self-recording, which tells you how much the teeth matter.
- Smiling hard on every line. A big commercial smile pulls the lips tight against the teeth. Keep the warmth in your eyes and voice, and let the mouth relax on the S words.
- A dry mouth. Dry lips and tongue make all the little mouth sounds harsher. Our guide to stopping clicks and sticky mouth noise covers the water, apple and lip balm routine that helps here too.

© The Voice Realm
Back off, and come in from above
Once your mouth is doing its share, look at where the mic is. The most common cause of a sudden sibilance problem is that you’ve crept closer during the session. Jim puts it plainly: “We do tend to sneak up on the mic a bit, and that can often intensify sibilance.”
Moving a few centimetres back is usually enough. You’ll lose a little of that cosy, close tone, but most reads sound better a hand’s width or so away anyway. If you want the full picture of distance and angle, our piece on mic technique for voice over walks through it step by step.
Then change the angle. Because the S is a jet of air coming straight out of the front of your teeth, the trick is to keep the mic out of that jet. Jim’s own preference is simple: “increasing the distance and angling the mic down from above often helps.”
Houghton suggests going further and hanging the mic “upside down, from slightly above, with the mic pointing towards the mouth but not placed in the path of any sibilant air-blasts.” He adds that this “won’t compromise the vocal sound.” He also mentions an old studio hack, a pencil held along the front of the mic with rubber bands, which he says “can be surprisingly effective.”
 VOICEMASTERACADEMYFirst read to first booking.Twenty modules. The first one is free.Start free
One warning from Jim, though. He’s seen voice actors move the mic so far to the side that “it drastically changed their tone.” Make small changes, a few degrees at a time, and record the test line after each one so you can compare.

© The Voice Realm
Is it the microphone?
Sometimes you buy a new mic and the S problem arrives with it. That’s not your imagination. Jim says “some microphones are simply better at capturing it,” because they have “a pronounced upper frequency response.” Houghton explains why: “lots of vocal mics are voiced with a broad boost somewhere around 5kHz to make voices sound closer, breathier or more intimate, and that will boost any sibilance.”
“Even a slight softening at the source can be beneficial in solving sibilance.”
Jim Edgar, JustAskJimVO
Before you blame the mic, give it a fair chance. Jim calls it the “awkward-getting-to-know-you phase” and suggests working on placement first. A bright condenser often needs to sit a little further away and slightly above, rather than right in front of your lips.
Also check your levels. Houghton notes that cheap mics and preamps “may have relatively low high-frequency headroom, which can lead to distortion.” If your peaks are hitting the top of the meter, every S gets a crunchy edge on top of the hiss. Turn the gain down so your loudest lines peak well below the top.
If you’ve tried all of that and it still sizzles, a different mic might be the answer. Houghton mentions dynamic mics such as the Shure SM7B, the Electro-Voice RE20 and the Heil PR-40, which “don’t react so dramatically to sibilance,” and ribbon mics, which sound a little darker. Both change your tone, so try before you buy if you can.
Fixing it afterwards: EQ first, then a de-esser
Even with good technique, some S sounds will still poke out. That’s where software comes in, and the order matters.
Start with plain EQ. Find the frequency where your worst S peaks (your spectrogram or a frequency analyser will show it) and take a narrow cut there. Jim’s reasoning is that “not much else in your vocal range lives in that 5kHz to 10kHz range, a narrow cut can work.” Houghton says a simple static EQ cut is the first thing he tries too, but warns it “can sometimes unhelpfully colour the vocal sound more generally,” so listen to the whole read after, not just the S words.
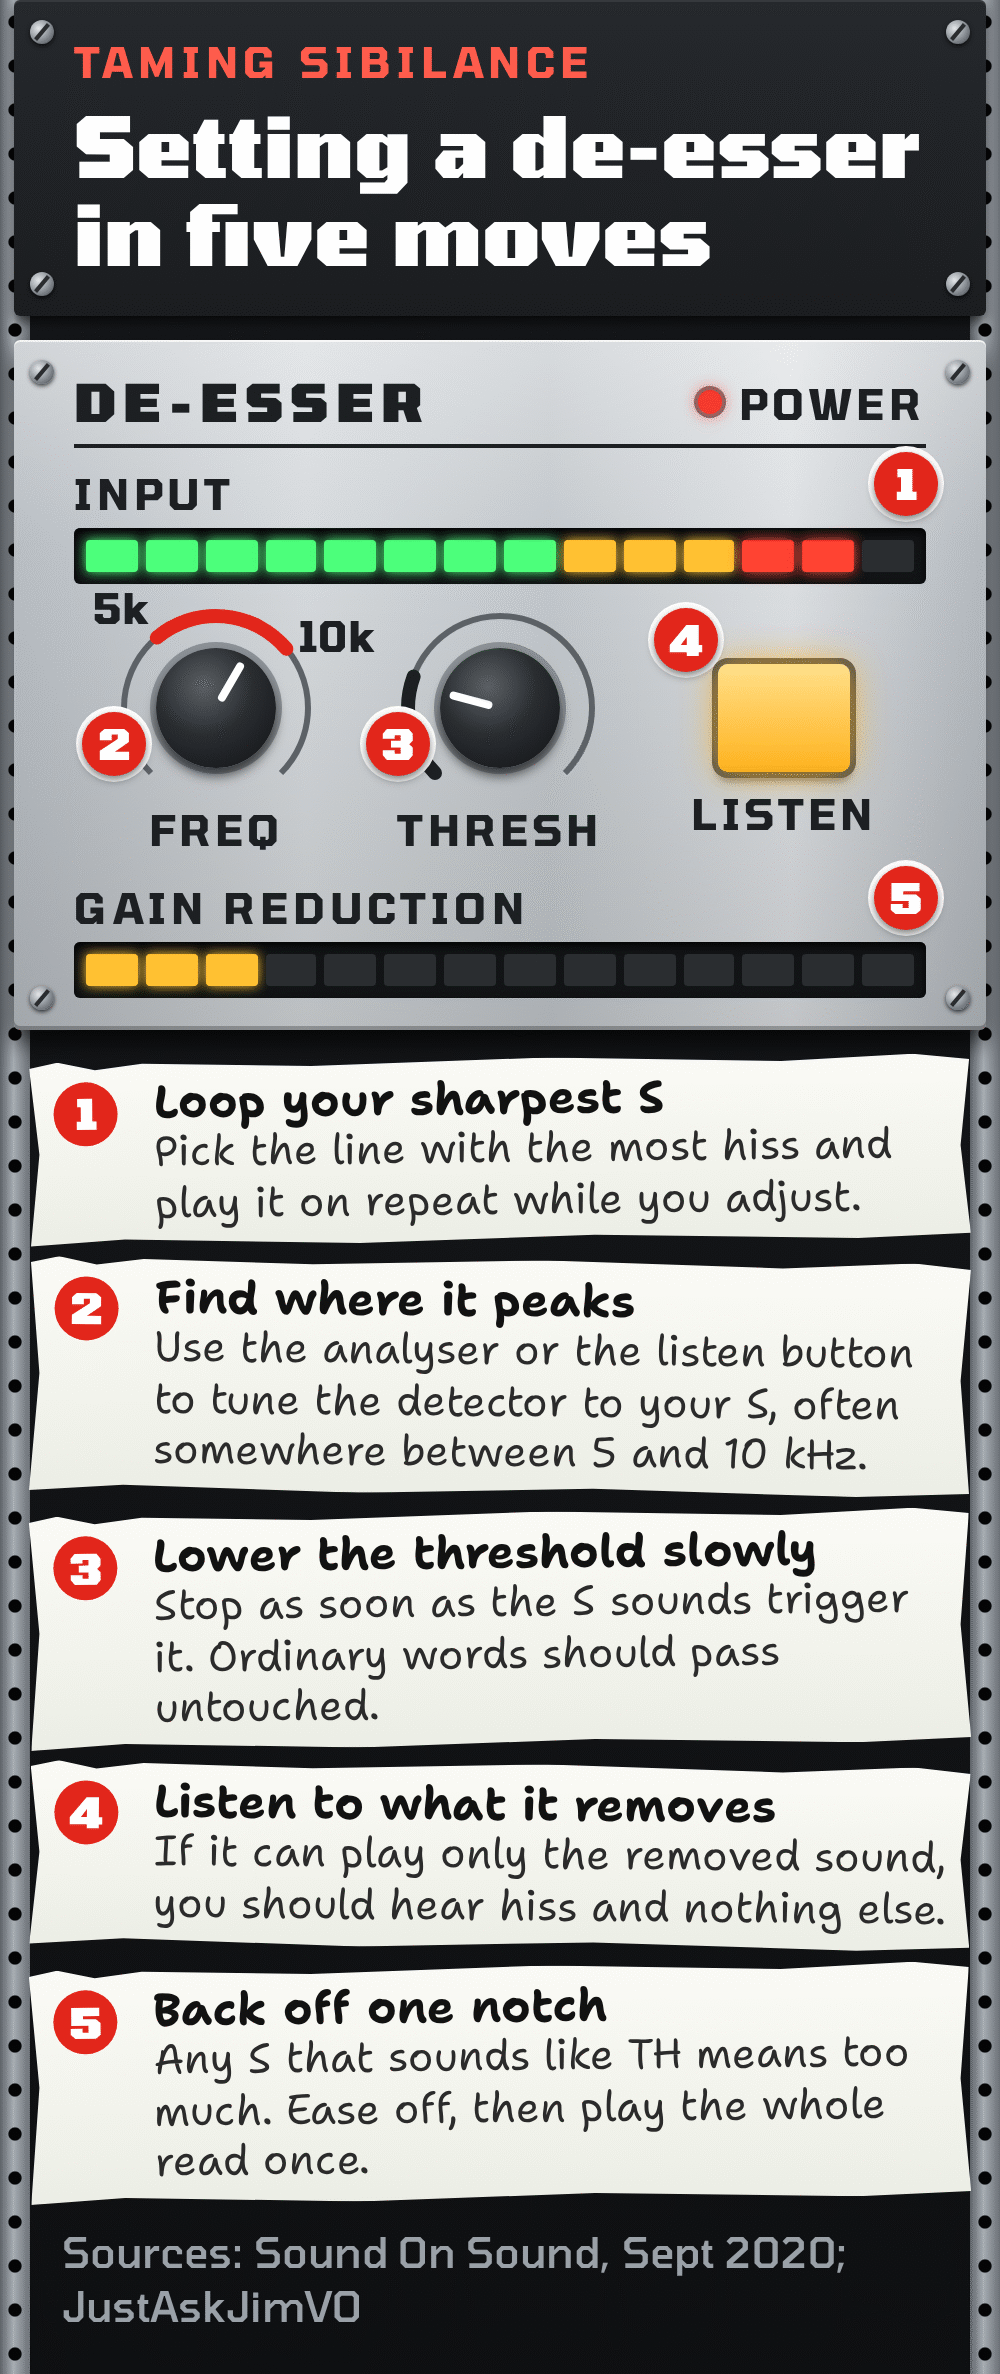
If a cut dulls your voice too much, move on to a de-esser. Think of it as a volume knob that only turns down when an S goes past. Jim calls de-essers “essentially very narrow band Compressors,” and Houghton describes the same idea: compressors “with a side-chain filter that you tune so they act only where there’s sibilance.”
The trap is going too far. Jim’s warning is the funniest line in any audio guide we’ve read: overdo it and your S sounds “turn into ‘TH’s’,” which he calls “the dreaded ‘Thylvethter Thyndrome’.” A client will notice a lisp much faster than a slightly bright S. “Any time you hear that happen, back off your settings until it goes away,” he says.
Houghton has one more option worth knowing for short scripts: cut the worst S sounds out by hand in your editor and turn just those down. It sounds slow, but on a thirty second spot it takes a couple of minutes, and nothing else in the read is touched. If you’re building your editing routine, our guide to editing your own voice over shows where this fits in the pass order.
© The Voice Realm
Check the very end of your chain
Here’s the one that catches people out. Your raw file sounds fine, you add compression and a limiter to finish it, and suddenly the S sounds are back.
That’s because compression squashes the loud, low body of your voice and leaves the short, bright S bursts standing taller. Jim warns that sibilance “can also be intensified by various dynamic effects such as Compression or Limiting,” so it’s “essential to review results at the end of your audiobook mastering or audition processing chain, even if your raw audio sounds clean.”
Houghton says the same of any brightening EQ. If you add a high shelf to give your voice some sparkle, a small dip in the S region alongside it usually keeps the lift without the hiss.
So make it a habit: after your last plug-in, listen once more, on earbuds, to the busiest S line in the script. If it stings there, a light de-esser at the very end, or a slightly gentler compressor, will usually sort it.
Your sibilance routine, start to finish
None of this needs to slow you down once it’s a habit. Before a session, sip some water and do a short warm-up that loosens the jaw. At the mic, check your distance hasn’t crept, and keep the capsule just above your mouth line rather than straight in front of it. Record your test line and look at it before the real script.
In the edit, cut what you can with a narrow EQ, use a de-esser lightly for whatever’s left, and listen once more at the end of the chain. If you ever hear a TH where an S should be, you’ve gone too far.
The best compliment a client can pay your S sounds is not to notice them at all. Get it right at the mouth and the mic, and the software only has to do a little tidying. That’s what a clean, finished file sounds like, and it’s the kind clients come back to.
Sources: Matt Houghton, “Managing Sibilance”, Sound On Sound, September 2020; Jim Edgar, “VO Studio Acoustics: Seeking Sibilance Solutions”, JustAskJimVO.
Ready to get booked?
See the jobs open right nowAbout Sarah Robbins
Sarah Robbins writes for The Voice Realm about finding voice over work, home studios, casting and the business side of voice acting.