
How to Treat a Room for Voice Over: Start Behind You
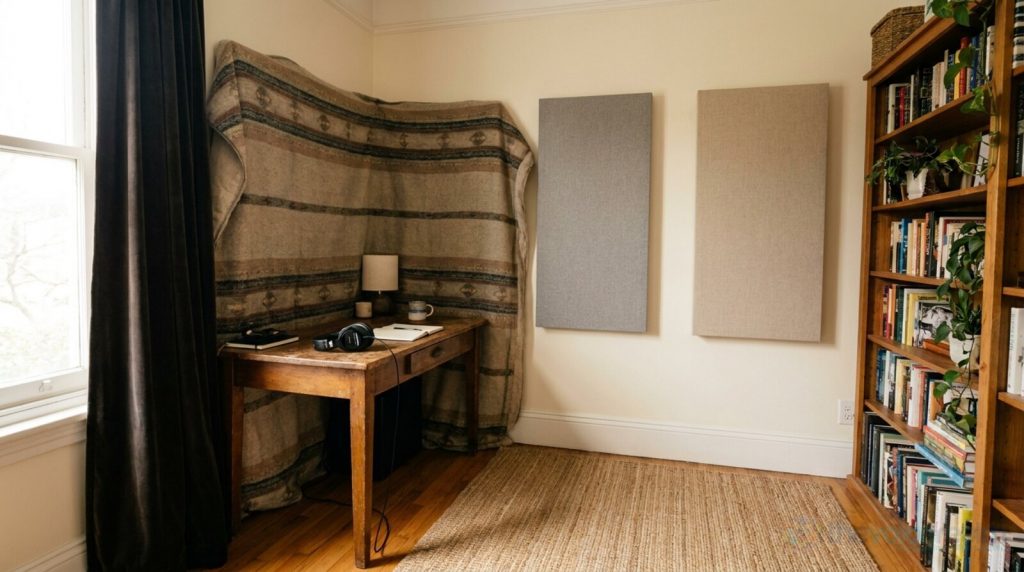
You’ve bought a decent microphone, plugged it in, recorded a line, and played it back. Something’s off. It sounds a bit like a bathroom, or a kitchen, or someone talking to you from the next room. The mic isn’t the problem. The room is.
This guide is for voice actors recording at home who want their reads to sound close, dry and clean without building a booth or spending a fortune. We’ll cover what acoustic treatment actually does, where it matters most (it’s not where most people put it), what to hang, and how to test the result with nothing more than your own recording setup.
Treatment and soundproofing are two different jobs
Mixing these two up is how people end up with a wall of foam and a recording that still has a bus in it.
Soundproofing stops sound getting in or out. It’s about mass, sealing and separation: heavy walls, solid doors, gaps closed, a room built inside a room. Foam panels do almost nothing for it. Sound goes straight through foam and out the other side.
Acoustic treatment controls what your own voice does once it leaves your mouth. Every hard surface in a room bounces some of it back, and a microphone picks up those bounces a fraction of a second after the direct sound. That’s the boxy, hollow, “recorded in a spare room” sound clients notice straight away, even when they can’t name it.
For voice over, treatment is the job you can do this weekend. Noise from outside is a separate problem, and we’ll come back to it at the end, because no amount of blanket will fix a leaf blower.
The physics is on your side here. The HyperPhysics reference site at Georgia State University notes that the right amount of echo depends on what a room is for, and that “a recording studio should minimize reverberation time in most cases for clarity of recording.” It also points out something useful for anyone working in a box room: “You won’t get a long reverberation time with a small room.” Small rooms don’t ring for long. What they do is send short, strong reflections straight back at the mic, which is exactly what treatment is for.
What your microphone is actually listening to
Most voice actors use a cardioid microphone, whether it’s a large condenser on a desk arm or a dynamic on a stand. Cardioid means it’s most sensitive at the front and least sensitive at the back. The front of the mic points at you. So what’s behind you?
The wall behind you. And the wall behind you is what the front of the mic hears, right after it hears your voice.
Hugh Robjohns, technical editor at Sound On Sound magazine, explained this in a 2011 answer to a reader who wanted to know whether a reflection filter would fix their room. Since the mic faces the performer, the reflections that matter most are the ones bouncing off the walls behind and beside them. His conclusion:
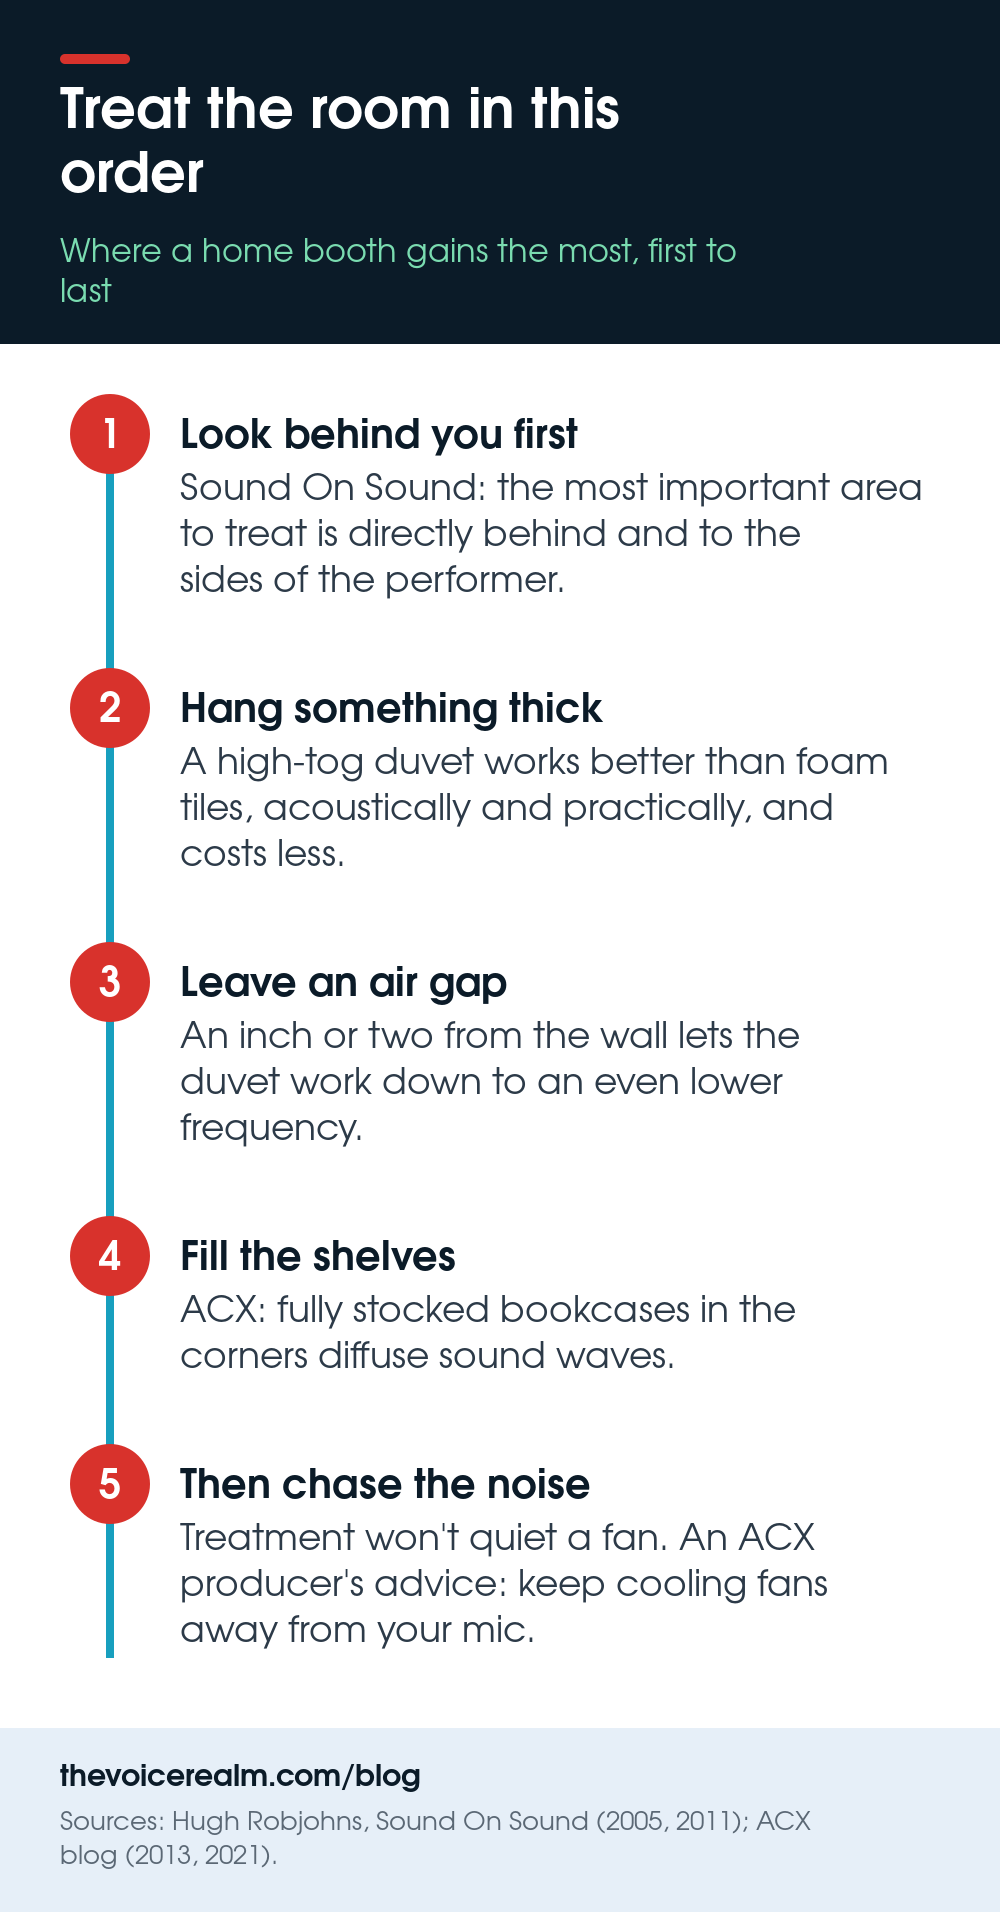
“The single most important area to treat with sound-absorption material is directly behind and to the sides of the performer.”
That one sentence changes where most people spend their money. The foam tiles glued to the wall in front of the desk, behind the mic, are treating the side of the room the mic cares least about. The bare wall behind your head is doing the damage.
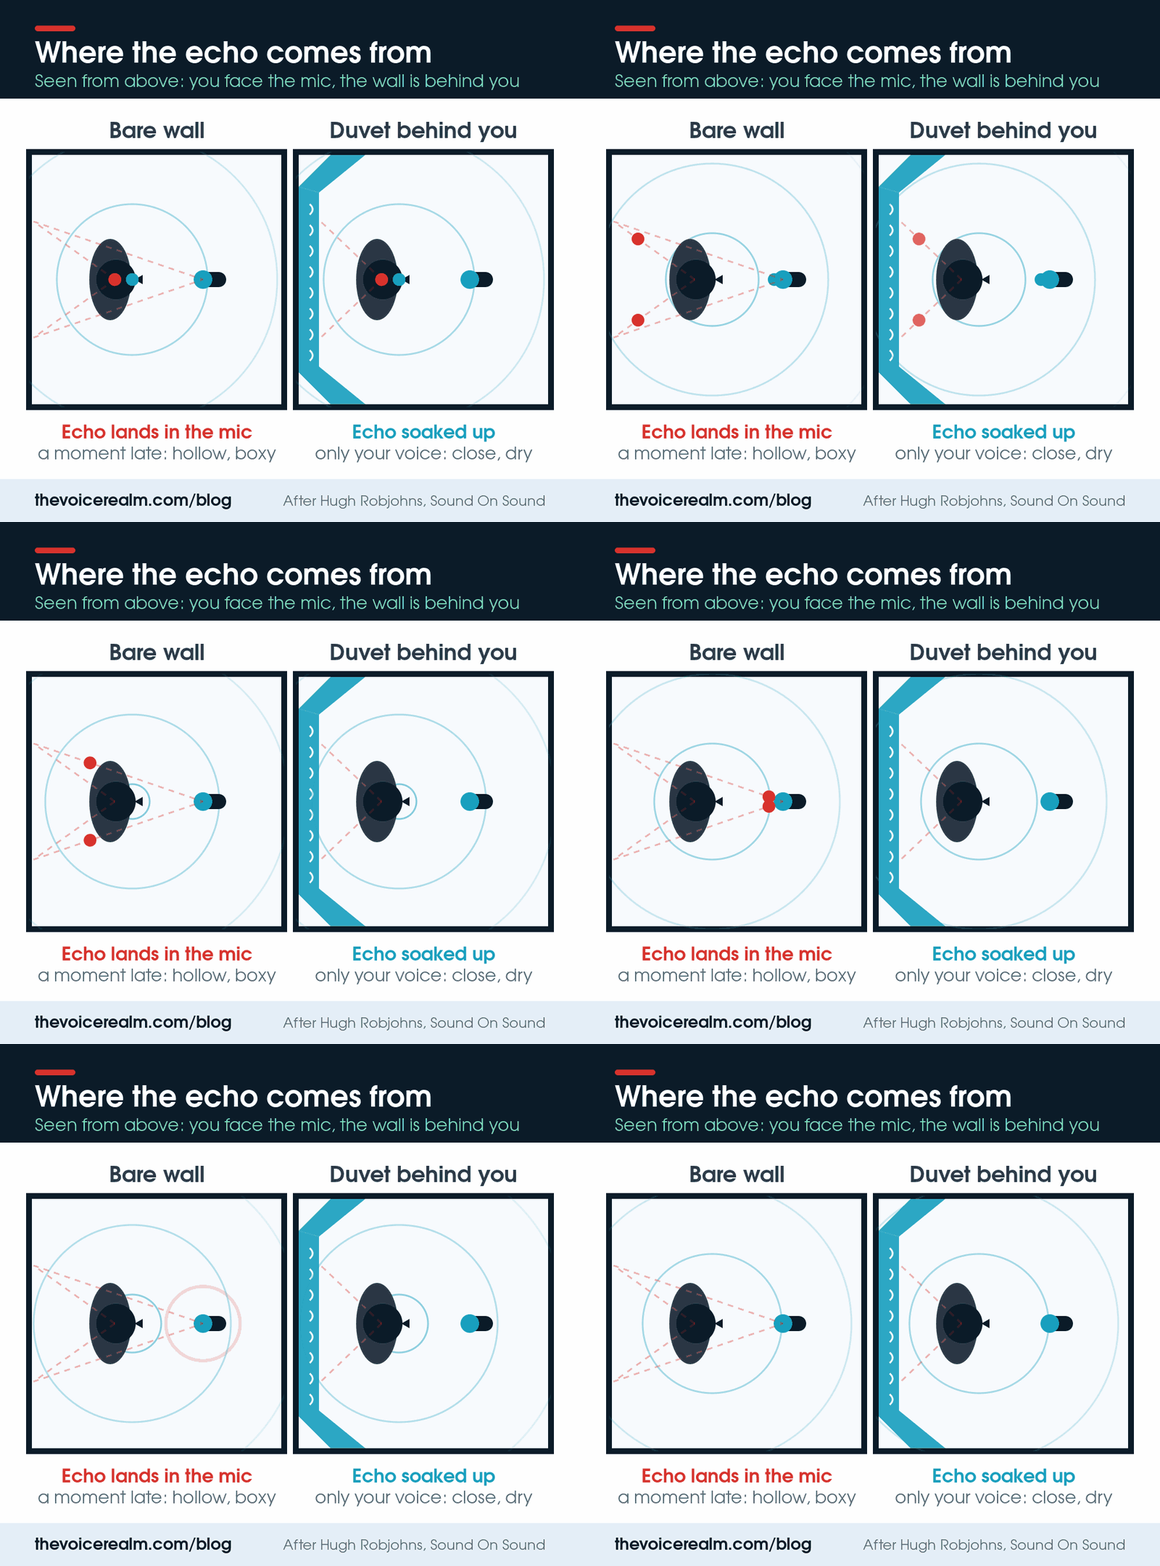
Seen from above: with a bare wall behind you, your voice bounces straight back into the mic. With a duvet there, it stops. © The Voice Realm
Start behind you, not behind the mic
Robjohns was also blunt about the little curved screens that clip behind a microphone. “All of these products are useful to some extent,” he wrote, “but they aren’t a magical cure-all and can’t instantly turn a bad-sounding room into a good one.” A screen behind the mic catches some of your voice before it hits the far wall. It does nothing about the reflection coming off the wall behind you, which heads straight into the front of the capsule.
So the first rule is simple. Before you buy anything, stand where you record, turn around, and look at what’s behind you. If it’s a bare wall, a window or a closed door, that’s where your first treatment goes.
In an earlier Sound On Sound answer from 2005, Robjohns described the setup the magazine had tested for home vocals. You face out into the room with your back to a corner, and you put absorption around that corner:
“By placing absorbent material in an arc behind the vocalist or performer, usually around the corner of the room, any sound that would normally be reflected from those walls behind the singer back into the mic gets absorbed instead.”
Why a duvet beats a box of foam tiles
Here’s the bit people don’t believe until they try it. In that same 2005 answer, Robjohns said the magazine had found foam tiles “will work well” but that “a high-tog duvet actually works better, both acoustically and practically.” A kingsize duvet is cheaper, hangs and comes down again without damaging the walls, and in his words “generally works over a wider bandwidth than most foam tiles will.”
The reason is thickness. Thin foam soaks up the top end of a voice, the sibilance and the air, and leaves the lower middle, where boxiness lives, bouncing around untouched. That’s why a room lined with thin foam can sound dull and boxy at the same time. His rule of thumb:
“The thicker and more absorbent the material, the lower the frequency it will work down to, and by spacing the duvet an inch or two away from the wall it will work to an even lower frequency.”
A duvet hung flat against plaster works less well than the same duvet hung from a curtain rail or a couple of hooks with a little air behind it. If you can fold it double, even better.
He was honest about the limit, too. “This approach won’t do much to sort out the problem of standing waves,” he wrote, “you’ll need proper bass traps for that.” For speech recorded close to the mic, that rarely matters much. For a deep voice in a small, square room, it’s worth knowing that bass build-up is a separate problem with a separate fix.
What a treated room looks like, from free to fully kitted
Here’s the good news. Most of what makes a room sound better is already somewhere in your house, and the money only starts to matter once you’ve used it all up. These are the set-ups that work, in the order most people should try them.
Free: use what’s already in the house
The wardrobe. Some of the best home recording spaces don’t look like studios at all. ACX, the audiobook production platform run by Audible, has published a lot of advice from the engineers who listen to home-recorded files every day. In a 2013 piece on creating a studio space, Darren Vermaas of Audible Studios described how he handled a noisy apartment building with window air conditioners: “you could find me hanging packing blankets and winter coats in my closet, positioning a microphone in there, and sweating it out while recording to make sure it sounded good. Not glamorous, and not comfortable, but it did sound good!”
A wardrobe full of clothes is a thick, uneven, absorbent box, with clothes on three sides soaking up your voice before it can bounce back. If there’s room, go one better: stand inside with the clothes behind you and face out, mic pointing back at you. The downside is heat and air, so keep sessions short and open the door between takes.
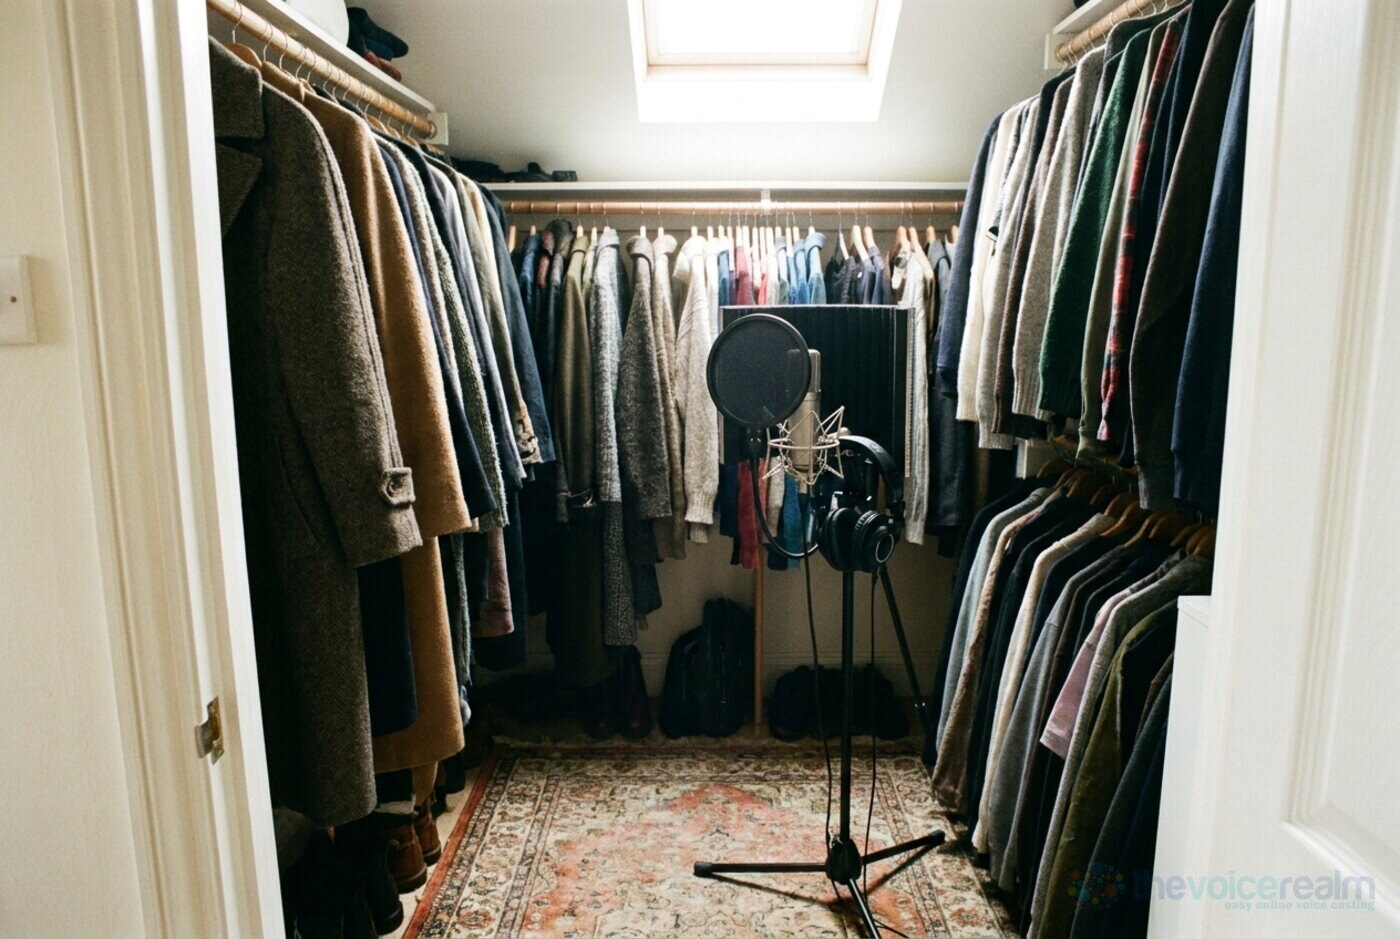
Free: a walk-in wardrobe, with clothes on three sides soaking up your voice. © The Voice Realm
The duvet on a rail. If you don’t have a walk-in wardrobe, take the idea to the wall behind your chair. A curtain rail or a tension rod a few centimetres off the wall, the thickest duvet in the house over it, and you’ve done the single most useful thing in this whole article. It comes down in thirty seconds when the room needs to be a bedroom again.
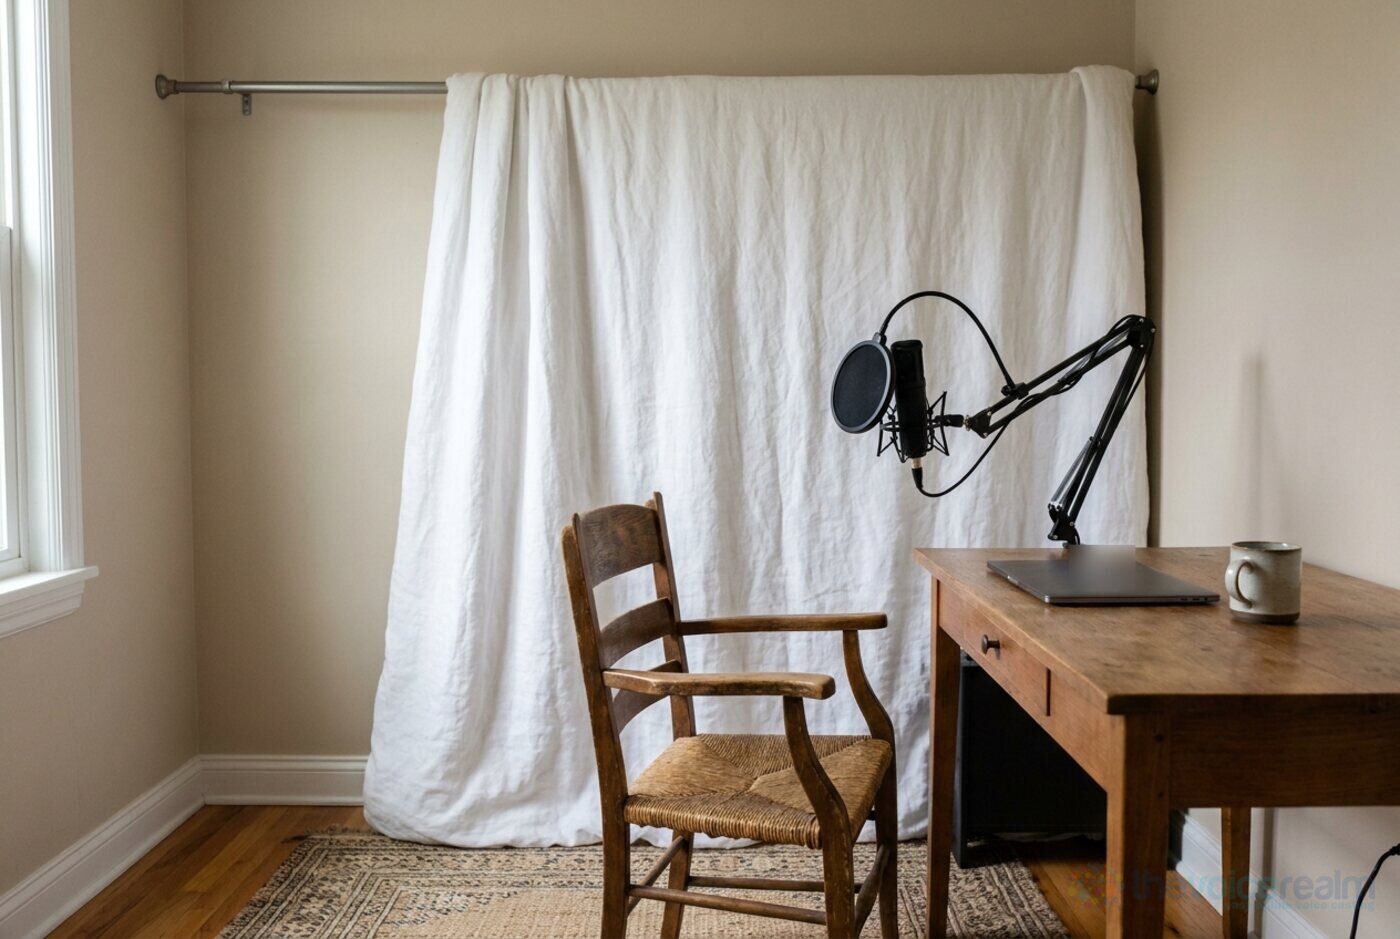
Free: the thickest duvet in the house on a curtain rail, a little way off the wall behind the chair. © The Voice Realm
The bookcase. In a 2013 ACX follow-up piece, Vermaas put the case for treatment plainly: “Treat your recording space. A lot of people think they simply set up a microphone and go.” In the same article, Rob Granniss of Brick Shop Audiobooks listed his favourite cheap fixes, starting with “bookshelves loaded with books, which provide a great refraction pattern and nice dense absorption.” Books work because they’re uneven. A full shelf breaks a reflection into lots of small ones heading off in different directions, which sounds far more natural than a flat wall. A 2021 ACX guide makes the same point: “Fully stocked bookcases placed in corners of your studio can help with acoustic treatment because they diffuse sound waves.” Put yours behind the chair, add a thick rug and draw the curtains, and a reading corner becomes a recording corner.
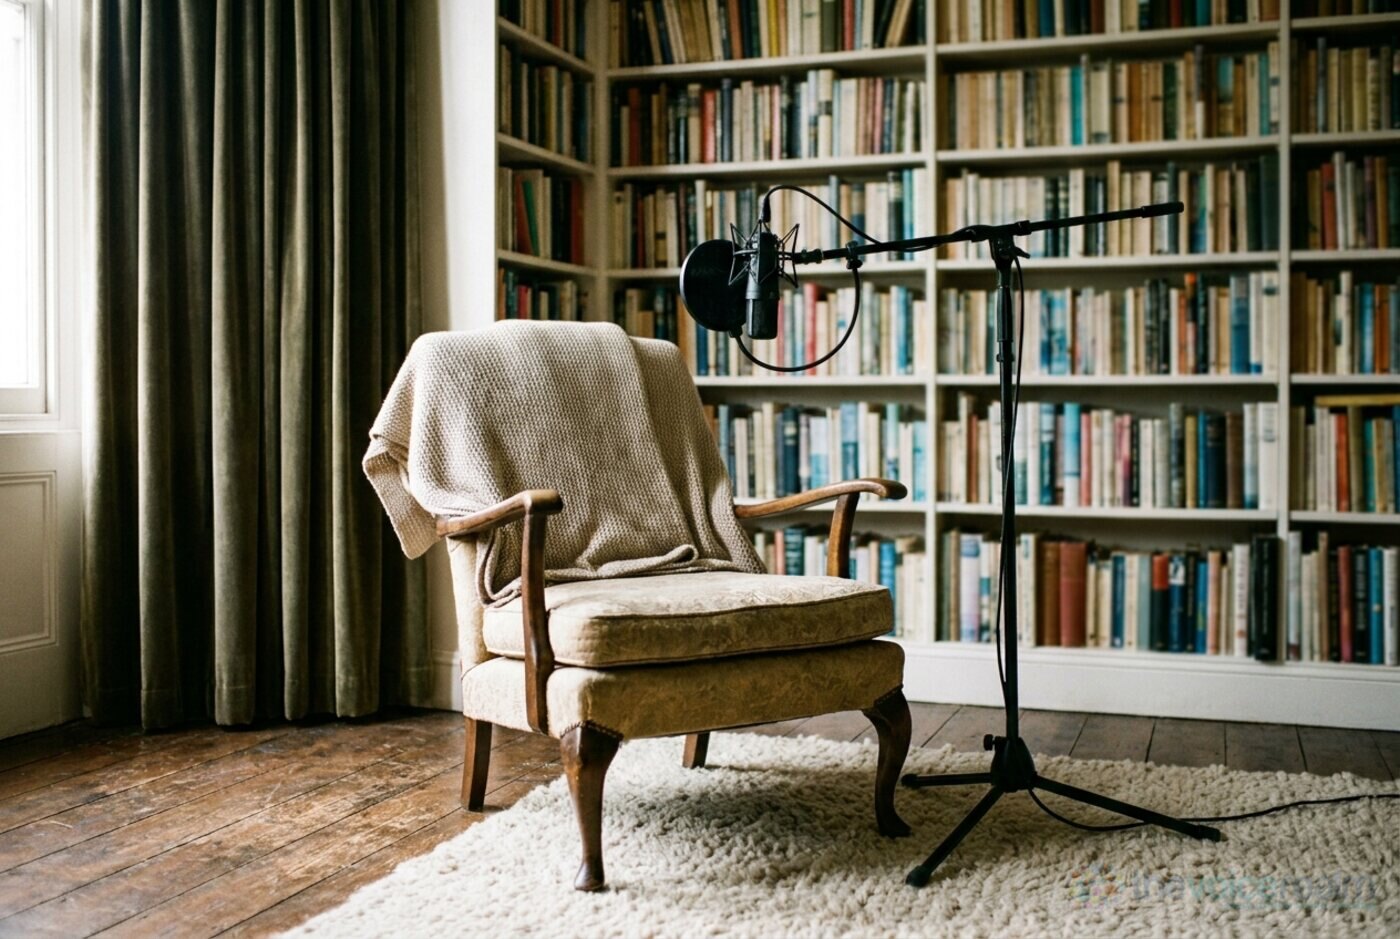
Free: a full bookcase behind the chair, a thick rug and heavy curtains. © The Voice Realm
A small spend: moving blankets and a clothes rail
Granniss’s next suggestion on that list was “hanging moving blankets,” and they’re the natural step up from the duvet. Removal blankets are heavy, quilted and cheap, and a couple of freestanding clothes rails turn them into a three-sided booth you can wheel into a corner. Clip the blankets over the top rail so they hang to the floor, arrange the rails in a U around your chair, and leave the open side facing the mic.
It’s not pretty, but it’s portable and it moves with you. If you rent, or you share the room, this is the set-up that gets you a dry sound without a single hole in the wall.
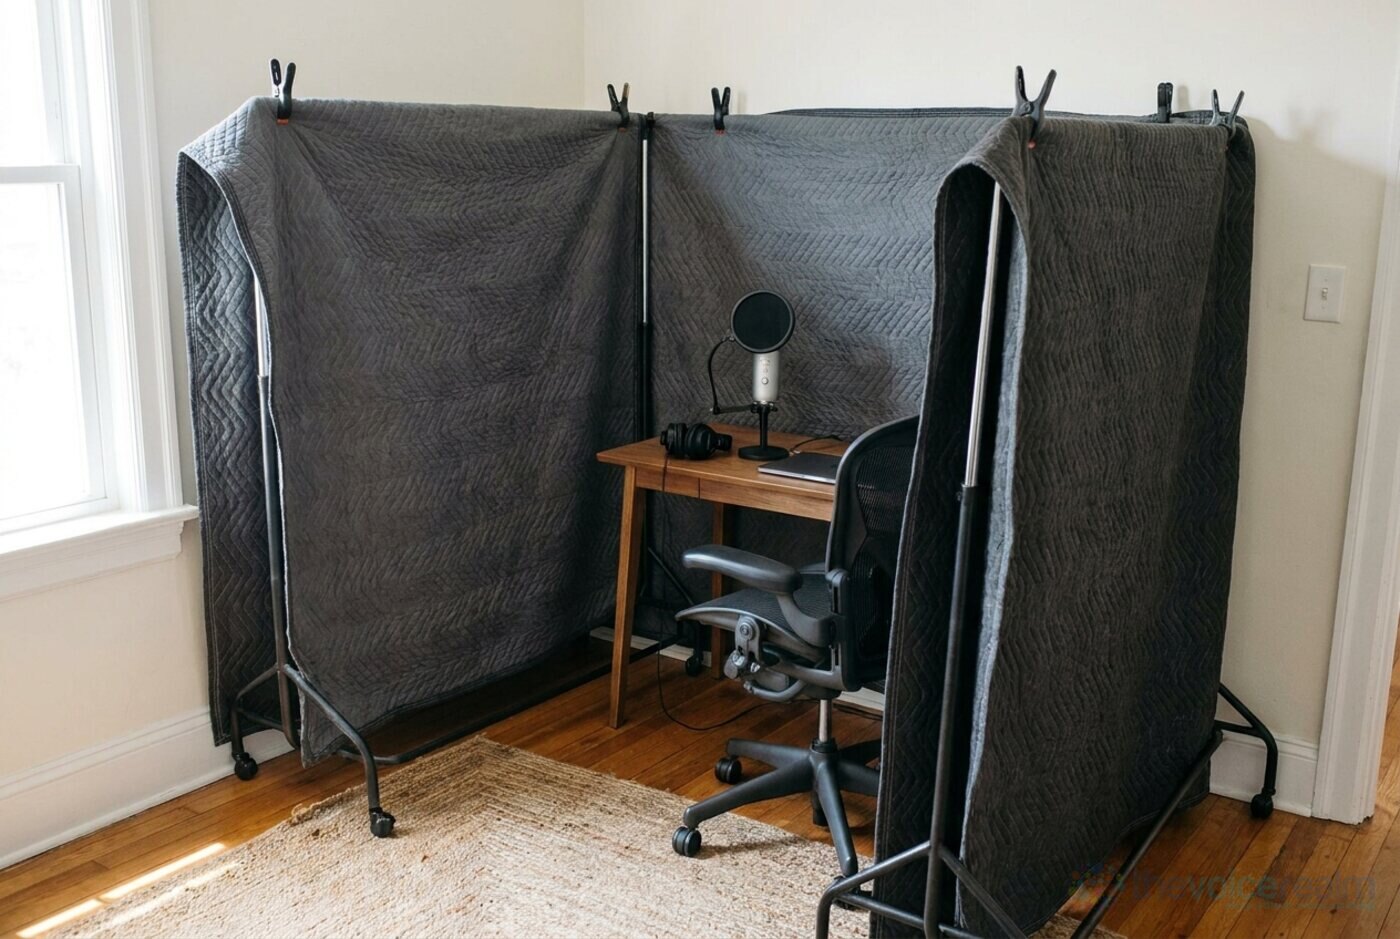
A small spend: moving blankets clipped over two clothes rails, arranged in a U around the chair. © The Voice Realm
A bit more: build your own panels
When you’re ready for something permanent, home-made panels are the best value in acoustics. A simple wooden frame, a slab of dense mineral wool or fibreglass insulation inside it, and plain breathable fabric stretched over the front. Sound On Sound’s rule of thumb applies here too: thicker panels work lower down the frequency range, and hanging them with a small gap behind makes them work lower still.
 VoiceEditSuiteRaw take in, clean take out.Breaths, dead air and room noise, gone.Show me
Hang them in that arc behind and beside where you sit, not on the wall in front of the mic. The 2021 ACX guide adds a useful warning about going too far with fabric: “leave a bit of space between each panel so the sound of your voice can be diffused a little and won’t sound flat (sometimes fabric absorbs sounds almost too well).” A voice recorded in a completely dead space can sound strangely choked. You want dry, not airless.
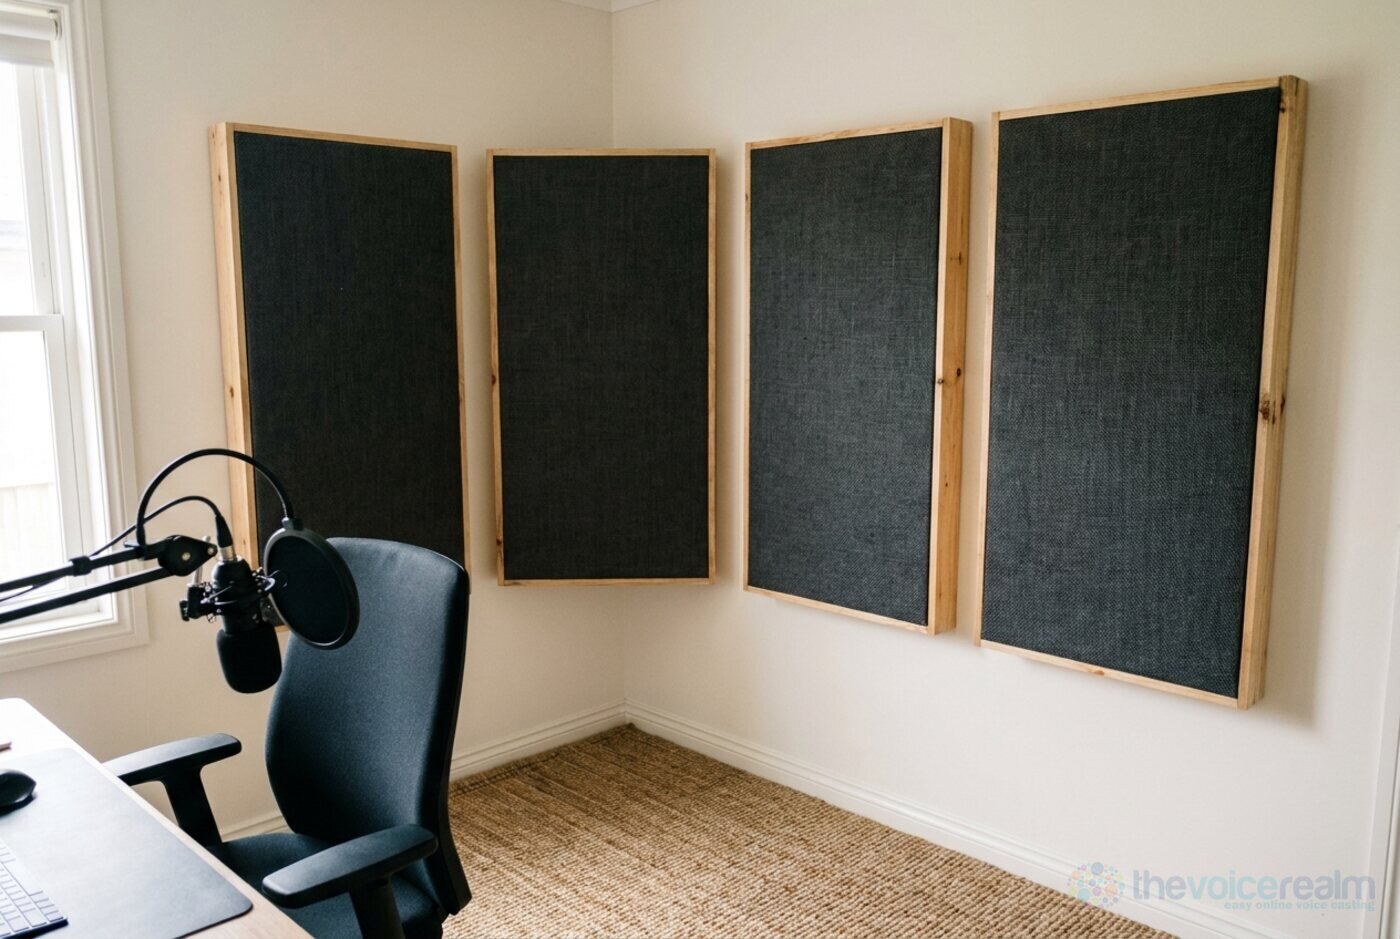
A bit more: home-made panels, wooden frames with dense insulation and plain fabric, hung around the corner. © The Voice Realm
A bigger budget: a treated room or a booth
At the top end there are two routes. The first is a fully treated room: thick panels behind and beside the performer, tall bass traps in the corners (Robjohns’s fix for the standing waves a duvet can’t reach), and a panel hanging from the ceiling above the mic, which catches the reflection straight down from above that most home set-ups forget.
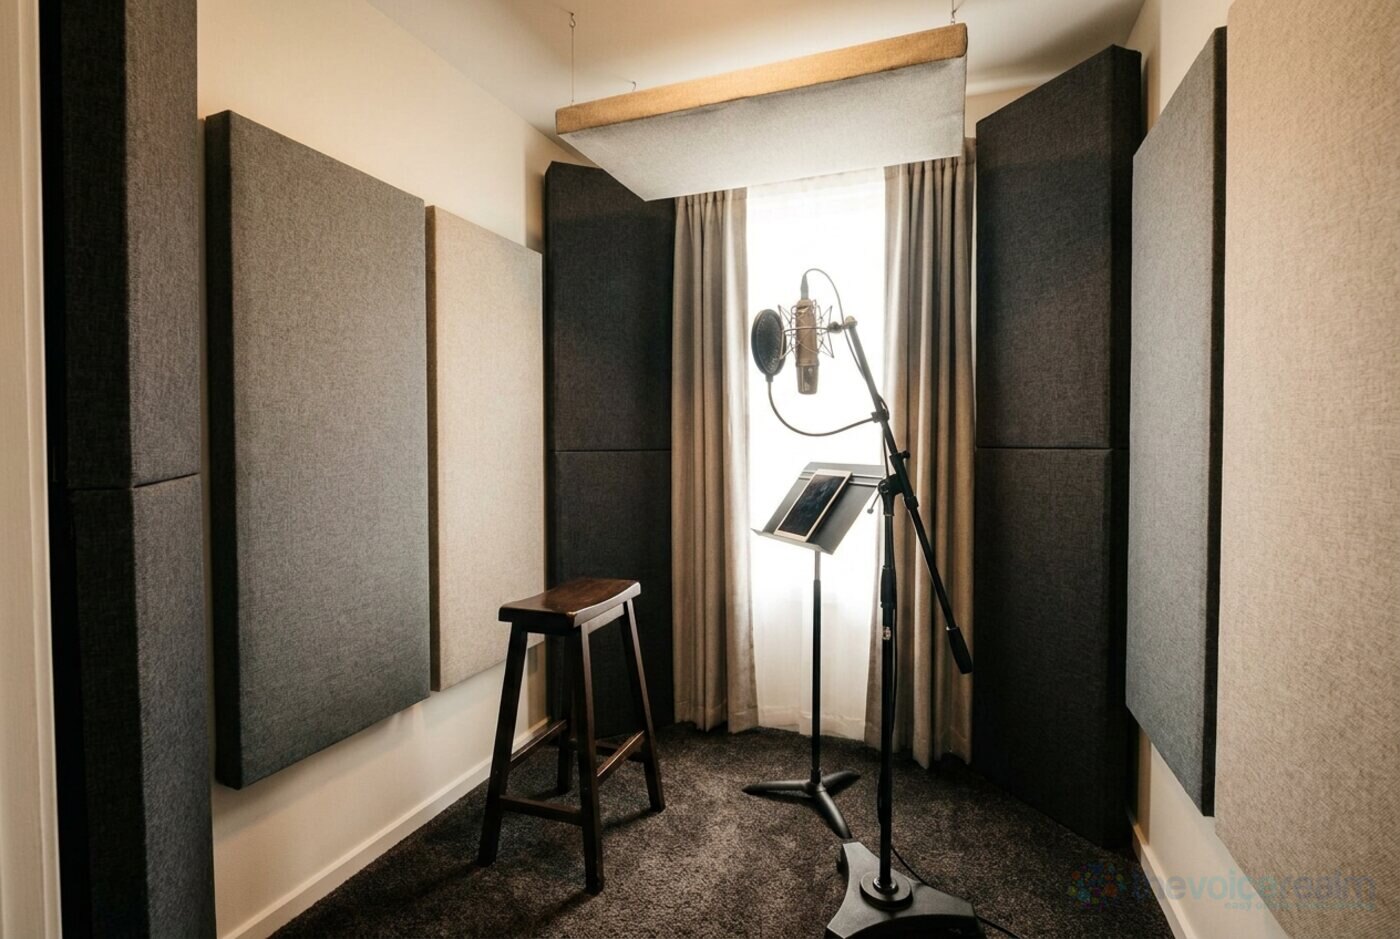
A bigger budget: thick panels, corner bass traps and a ceiling panel above the mic. © The Voice Realm
The second is a freestanding booth, a sealed box with a heavy door that you stand or sit inside. It’s the only option in this list that also blocks some outside noise, because it’s built from mass and seals rather than soft material. Check what’s lining the inside before you buy, though. Thin foam in a small box brings back the boxy sound you were trying to escape, so the lining matters as much as the walls.
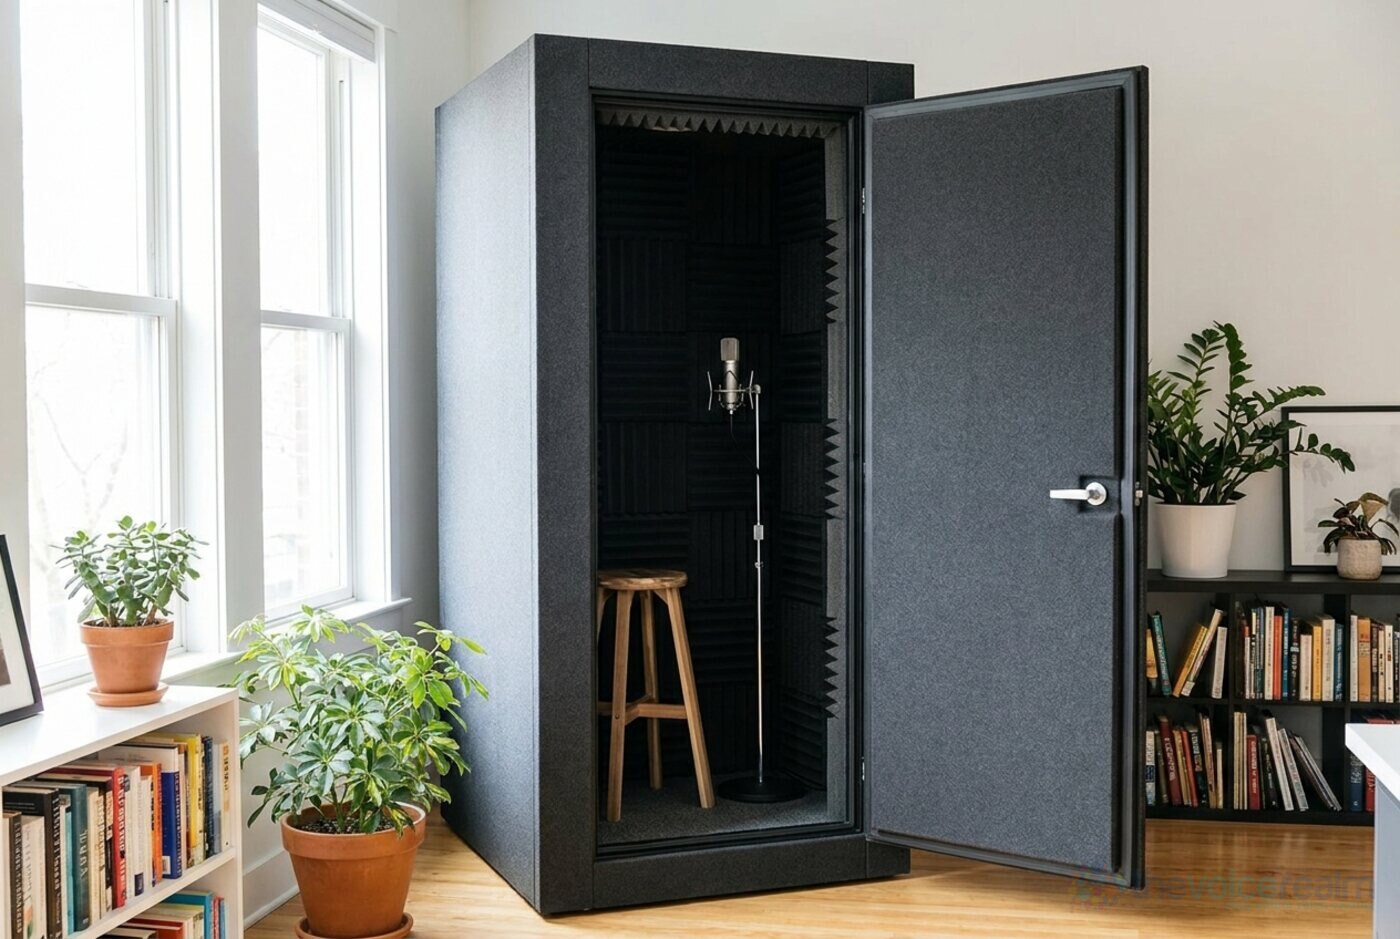
A bigger budget: a freestanding booth. Check what lines the inside. © The Voice Realm
Most working voice actors never need either. A treated corner and a quiet room will pass any client’s ears. But if your home is noisy and you’re recording every day, this is where the money goes.
© The Voice Realm
Where to put yourself in the room
Position matters as much as materials. The worst spots are close to a single bare wall, facing it, and dead centre in a small square room, where reflections from every side arrive at once.
The ACX 2021 guide gives a starting point for where the mic goes: “A microphone is best set up at a point no further than 40% away from the front wall, half-way between the side walls, and 60% away from the back wall.” Treat that as a place to start testing rather than a law. Then apply the Sound On Sound approach on top: your back to the treated corner, facing the open room, mic in front of you.
A few more things that help straight away:
- Get closer to the mic. The nearer your mouth is to the capsule, the louder your direct voice is compared with the reflections. A hand’s width is a sensible distance for most voice work, with a pop filter in between.
- Cover the floor. A hard floor bounces sound up into the mic. A thick rug under you does a lot for very little.
- Draw the curtains. Glass is one of the most reflective surfaces in a house. Heavy curtains help with reflections, and ACX notes that “thick curtains can help block out many noises (but not construction sounds like jackhammers).”
How to test your room without buying anything
You don’t need a measurement microphone or acoustic software to hear whether treatment is working. You need your ears, your recording setup and ten minutes.
- Clap test. Stand where you record and clap once, sharply. Listen to the tail. A ringing, metallic flutter means parallel bare walls are bouncing sound between them. A dull, short thud is what you’re after.
- Record a baseline. Before you hang anything, record thirty seconds of a script you know well, at your normal distance and level. Save it.
- Change one thing at a time. Hang the duvet behind you. Record the same thirty seconds. Then add the rug. Record again.
- Listen on headphones, then on speakers. Compare the files at the same volume. The treated version should sound closer, as if you’ve moved nearer to the listener, with the ends of words stopping cleanly instead of trailing off into the room.
- Listen to the gaps. Turn the volume up and play the silence between sentences. Room reflections show up as a faint hollow tail on the last word. Noise shows up as hiss or hum underneath everything. They’re different problems.
Get it measured, before and after
Your ears will tell you a lot, but they adjust to a room fast, and it’s hard to trust them on a before-and-after a day apart. A measurement doesn’t drift. The free Home Studio Analysis at Voice Edit Suite is built for exactly this: read a 30-second script, upload the file, and it measures your room’s echo and reverb tail, noise floor, hum, sibilance and level consistency, then tells you what to fix first.
Two things make it useful for treatment. Upload the recording exactly as it came out of the mic, with no noise reduction, EQ or compression, or you’re measuring your plug-ins instead of your room. And run it twice: once before you hang anything, and again after. If the echo and reverb numbers drop, the duvet has earned its place on the wall. If they don’t move, you’ll know to try a different spot before you spend a cent on panels.
Don’t try to treat your way out of a noise problem
Here’s where a lot of people lose a month. If the problem in your recordings is noise, a hum, a hiss, traffic, a fridge, treatment won’t fix it, and piling on more foam just makes the room sound dead while the noise carries on underneath.
Peter A. Rohan, an ACX producer, told the ACX blog in 2013 about the lesson he learned the hard way: he’d spent everything on soundproofing and absorption, “only to find that it was the cheap mic that I was using that was generating most of my noise floor.” In the same piece he warned about computers: “be wary of cooling fans and keep them away from your mic.”
So before you buy another panel, work through the sources of noise first:
- Laptop or desktop fans near the mic (move the computer, or record with it in another room)
- Fridges, freezers, air conditioning and heating, which switch on and off on their own schedule
- A gain setting that’s too high on the interface, which lifts the hiss along with your voice
- Street-facing windows, and the time of day you record
Clients and platforms measure noise directly. If you want to know the numbers a finished file is judged against, we’ve covered the loudness and noise floor targets in our editing guide.
A weekend plan for a better-sounding room
Put all of that together and treating a room for voice over comes down to a short list you can do in two days.
Saturday morning: pick the room. Quietest place in the house, away from the street and the kitchen, ideally with carpet, furniture and a wardrobe. If you’re weighing up the options, our older piece on choosing a room to record in is still a useful checklist.
Saturday afternoon: record your baseline and run it through the Studio Analysis so you have a starting score, then hang the thickest duvet or moving blanket you own behind where you’ll stand or sit, with a small gap from the wall. Record again and compare.
Sunday morning: add the sides. A second blanket on a clothes rail, a filled bookcase, or an open wardrobe on either side of you. Rug on the floor, curtains closed, towel on the desk.
Sunday afternoon: move the mic and yourself until the recording sounds closest and driest. Then deal with noise: fans, fridges, gain. Record a final comparison, run the analysis again, and put the two reports side by side. Keep all three recordings too, so you can hear how far you’ve come.
If you’ve tried all of that and something still sounds wrong, it’s worth reading through the mistakes we see most often in home booths, because the fix is often something small. And if you’re just starting out and want a structured way to learn the recording side alongside the performance side, Voice Master Academy covers both.
A treated room doesn’t make you a better actor. What it does is get out of the way, so the person listening hears you and not your walls. On a shortlist of auditions, that’s often the difference between being heard properly and being skipped after the first line.
Sources: Hugh Robjohns, “Q. Is a ‘reflection filter’ worth the money?”, Sound On Sound, August 2011; Hugh Robjohns, “Q. How do I set up acoustic treatment for recording vocals?”, Sound On Sound, July 2005; Scott Jacobi, “Creating Your Studio Space” (October 17, 2013) and “ACX Studio Gear Series: Home Studio Setup, Part 2” (November 13, 2013), ACX blog; Andreea Gabor, “A Studio of One’s Own”, ACX blog, February 8, 2021; R. Nave, “Reverberation Time”, HyperPhysics, Georgia State University. All accessed 26 September 2026. Photographs are illustrations of each set-up.