Blog
Blog

You’re four minutes into a clean chapter, the read is flowing, and then your tongue trips over “statistically”. Most people at a home mic do one of two things next. They stop, sigh and start the whole paragraph again, or they carry on, say the line twice and leave a note to fix it later. Punch and roll is the third way, and once it’s in your hands you’ll wonder how you ever worked without it. This guide is for anyone recording long-form voice over at home, audiobooks, e-learning, corporate narration, who wants fewer edits and a session that keeps its rhythm.
What punch and roll actually does
The idea comes from the tape days. An engineer would wind the tape back, play the actor a few seconds of what they’d already recorded, and drop into record at exactly the right moment so the new take carried on from the old one. Modern editors do the same thing with a keystroke.
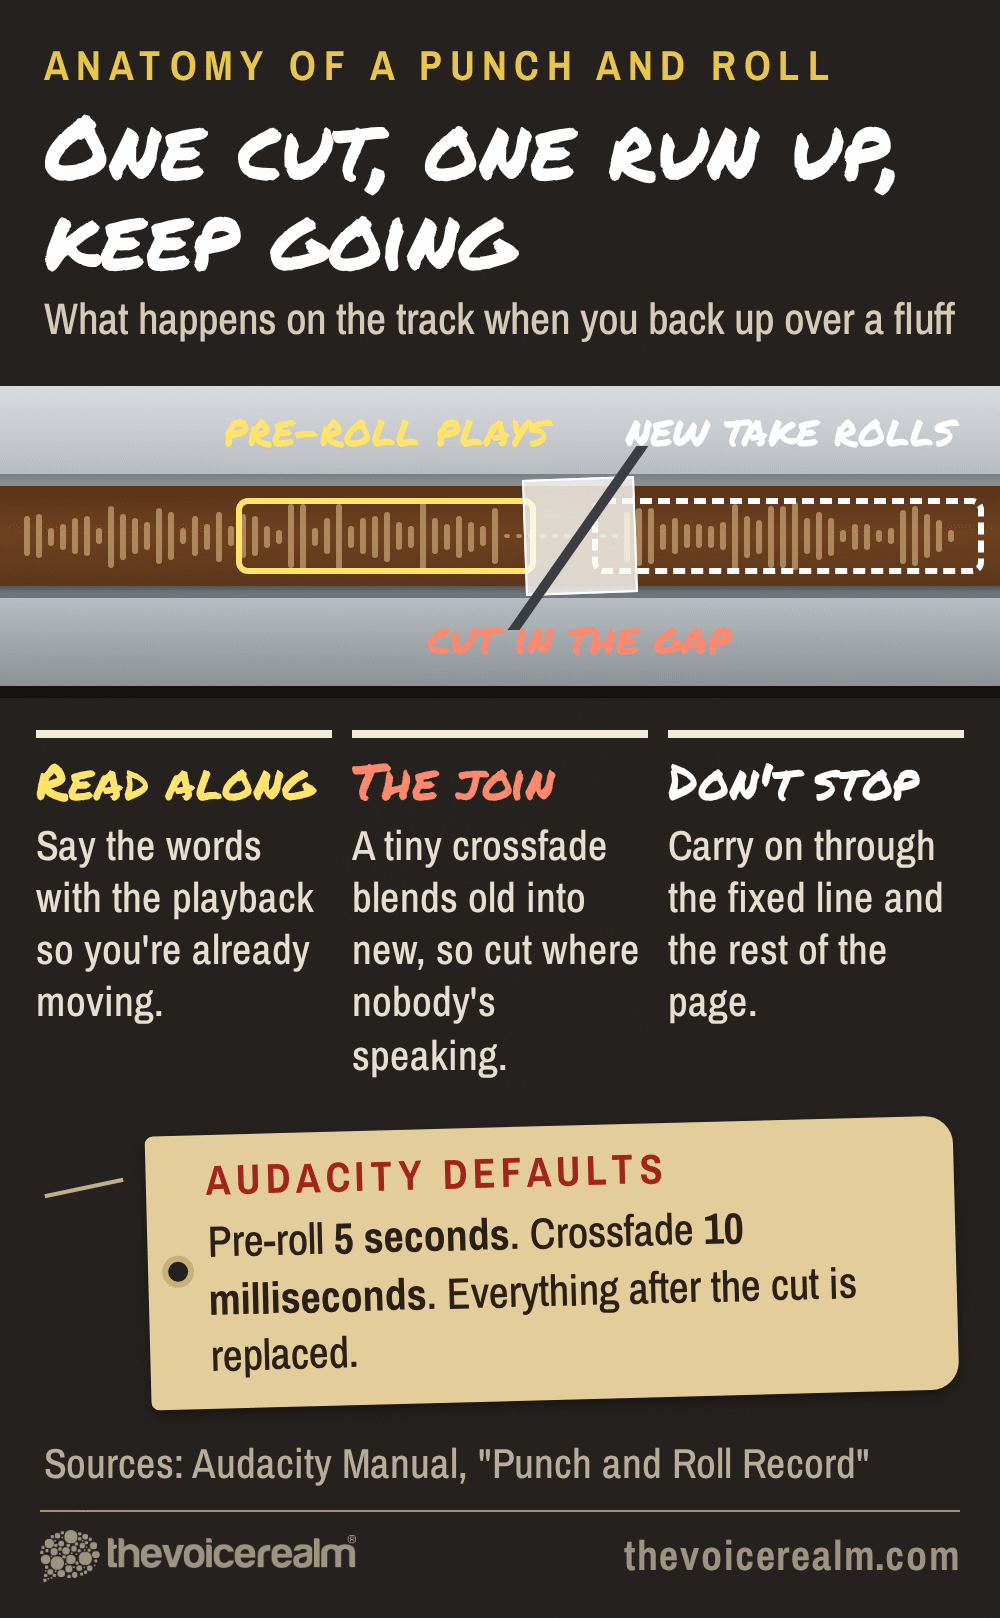
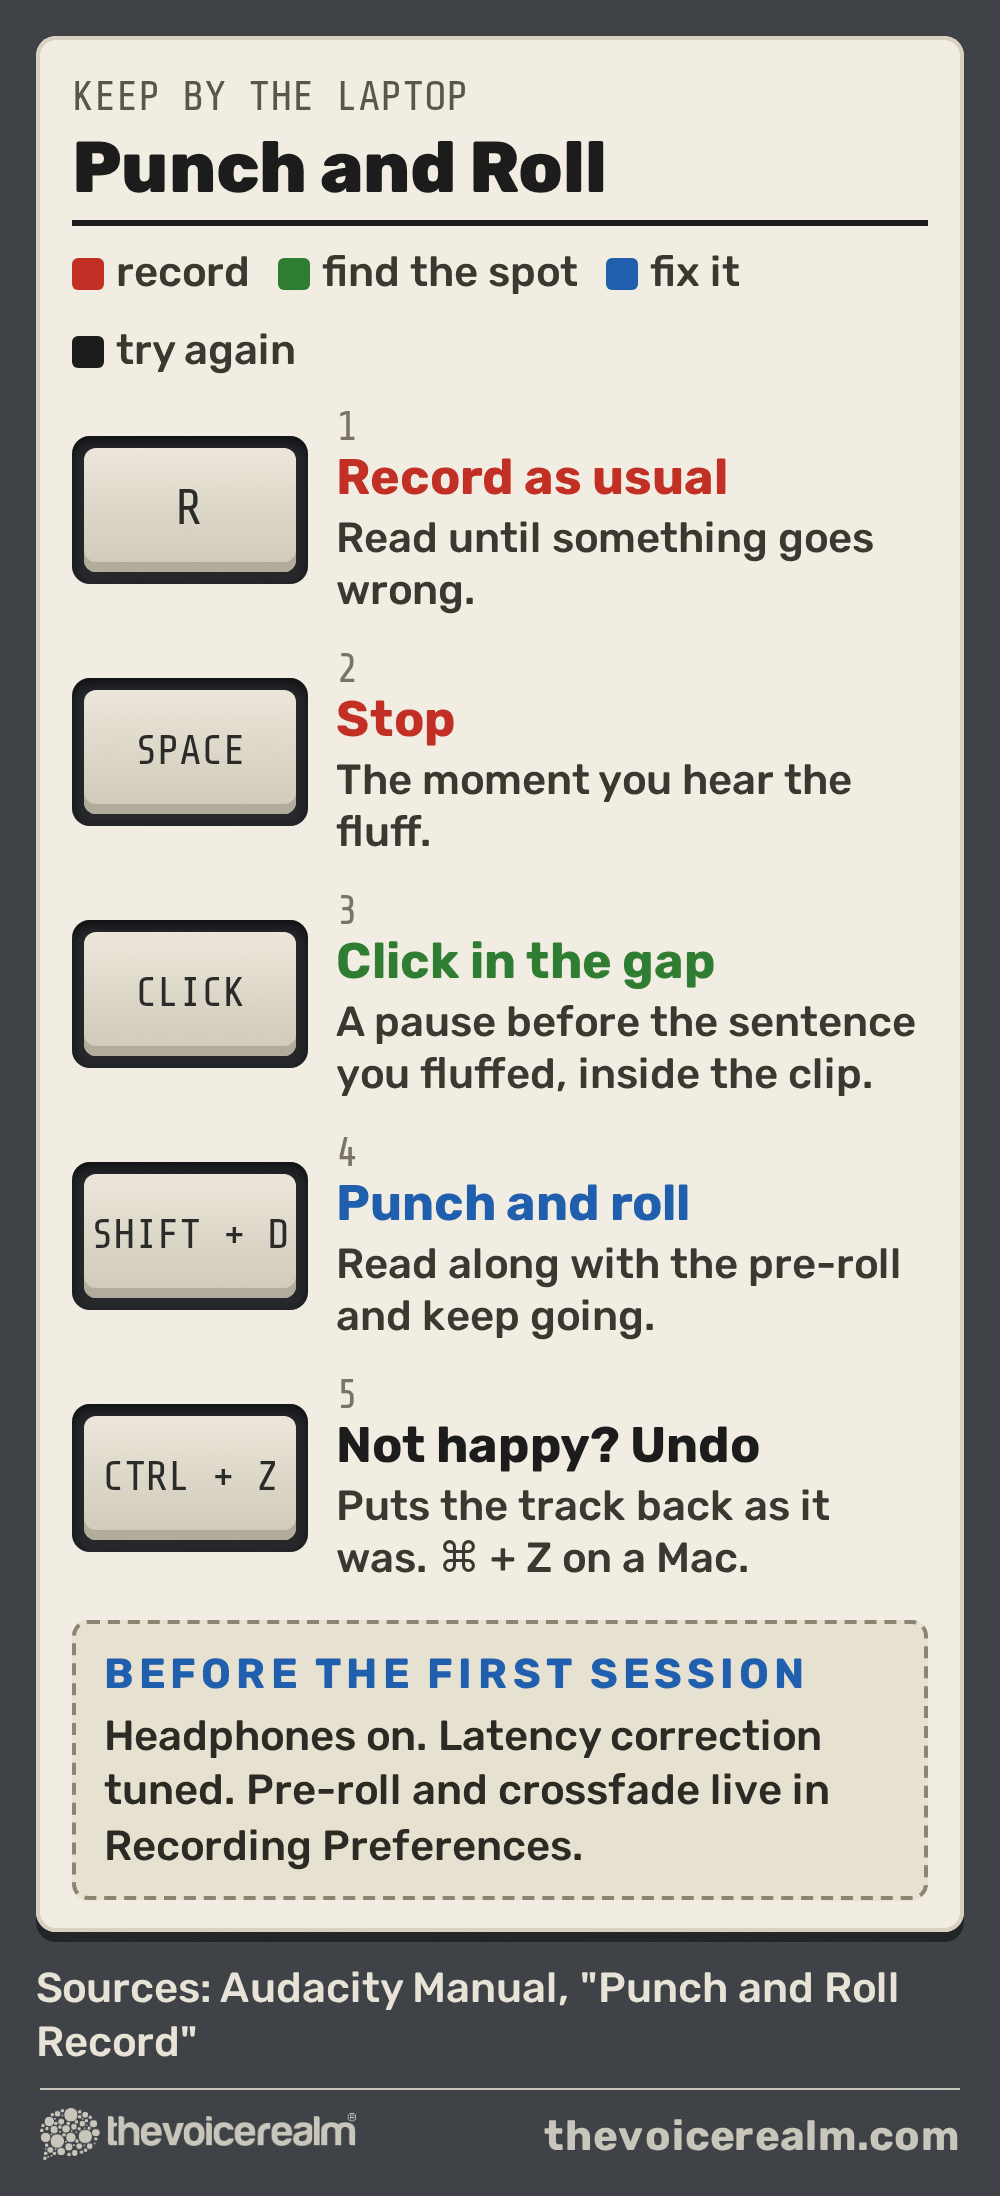
Here’s the loop. You make a mistake and stop. You click just before the mistake, at a natural gap. You press the punch and roll command. The software throws away everything after that point, plays you a few seconds of the good audio leading up to it, then switches to record exactly where the cut is. You read along with the playback, keep going through the line you fluffed, and carry on with the rest of the page. One track, no gaps, no pile of takes to sort through later.
The Audacity manual puts the payoff plainly: “You can stop, back up over a mistake, and continue recording, resulting in one track that eliminates the errors and is properly timed, without the use of cutting, pasting, and clip-moving commands, or mixing of multiple tracks.” Audacity calls it Punch and Roll Record. Other editors call the same idea punch recording, auto punch or pre-roll recording, and most of the big ones have some version of it.

© The Voice Realm
Why it beats a stack of retakes
When you say a line twice and keep going, you’ve only moved the work. Somebody, probably you, has to find every flub later, listen to both versions, pick one, cut the other and tidy the join. Across a ten hour audiobook that’s hundreds of small decisions made when you’re tired and no longer remember how the line was meant to sound.
Punch and roll moves the decision to the moment you have the most information. You’ve just heard the flub. You know what the sentence needed. The energy of the paragraph is still in your body. Fixing it right there almost always sounds more natural than a patch recorded an hour later.
Faster now, slower later
You keep reading and say the line again. The session feels quick, but every fluff becomes a job for the edit, and each join has to be hunted for and checked by ear.
A few seconds now, almost nothing later
You stop, back up and read along into the fix. The raw file comes out close to finished, and the only edits left are the ones you couldn’t hear in the moment.
It also keeps you honest. When the fix happens immediately, you can’t let three average lines slide because you’ll “sort them in the edit”. The file you finish the session with is very nearly the file you send. If you already have a set order for cleaning up a finished read, punch and roll makes the first pass of it, the hunt for fluffs, almost disappear.
There’s a performance benefit too. Starting a paragraph cold, over and over, trains you to sound like you’re starting. Reading along into a fix trains you to sound like you’re in the middle of something, which is exactly what the listener should hear.
Set it up before you need it
The first time you try punch and roll should not be in the middle of a paid session. Ten minutes of setup on a quiet afternoon saves a lot of swearing later.
Wear headphones. The Audacity manual says it straight out: “It is recommended to use headphones when using Punch and Roll recording.” If the pre-roll plays through speakers, your microphone hears it, and there’s a risk of that sound ending up in your recording.
Sort out latency first. Every interface takes a few milliseconds to get sound in and out. Your editor needs to know how long, so the new recording lines up with the old one. Audacity calls this the latency correction setting and treats it as a must, warning that “Failure to do this may result in unwanted bursts of audio at the splice point, especially if you are not using headphones.” Most editors have a simple loopback or click test in their manual for measuring it. Do it once per interface and write the number down.
Choose your pre-roll. This is how much of your good audio plays before the recording starts. In Audacity it’s “the amount of existing audio, in seconds, that will be played before the repair recording starts. The default is five seconds.” Five seconds is plenty for most narration. For fast commercial copy, two or three is often enough. For slow, emotional audiobook passages, a longer run up helps you find the mood again.
Leave the crossfade alone at first. At the join, the software blends a sliver of the old audio into the new so there’s no click. In Audacity the length is set in Recording Preferences, and “The default is ten milliseconds.” That’s short enough that you’ll never hear it as a fade. Only change it if you keep hearing a tick at your joins.
Learn the shortcut. If you have to reach for a menu, you’ll stop using it. In Audacity it’s Shift and D. Put it somewhere your hand rests naturally, and if your editor lets you, map it to a foot switch or a spare key.

© The Voice Realm
Reading along into the fix
This is the part that feels odd the first few times. When the pre-roll starts, don’t wait silently for the record light. Speak with the playback. Mouth or quietly say the words you already recorded, at the same pace, so that when the software flips into record you’re already moving.
Audacity’s manual recommends exactly this: “Repeat your performance in unison with the pre-roll playback, and continue as the play head moves beyond the end of the track. This is easier than trying to start just as soon as the recording starts.” It’s the difference between a runner taking a baton at full speed and one standing still waiting for it.
© The Voice Realm
Breathe where you breathed before. If the original take had a breath just before the cut, take the same breath at the same moment. If it didn’t, don’t add one. A sudden extra breath is one of the most common giveaways that a line has been patched.
And if the fix isn’t right, don’t fight it. Stop, undo, go again. In Audacity, Ctrl and Z puts everything back to how it was before the punch, and Shift and D starts another attempt from the same spot.
Where to cut in
The cut point decides whether a join is invisible or obvious, so it’s worth a second’s thought each time.

 VoiceEditSuiteEleven tools. One browser tab.Auto Clean UpACX PrepStudio RescueSee the toolsBuilt for working voice actors.
Cut in a gap, not a word. The cleanest place is the small silence between sentences, or a pause between phrases. Joining in the middle of a word means matching pitch and mouth shape mid-sound, which is hard to do perfectly.
Go back further than you think. If the fluff was on the last word of a sentence, cut in at the start of that sentence, not just before the bad word. Sentences have a melody, and you can only rebuild the melody from its beginning.
Watch the breath. A pause with a breath in it gives you a choice of cutting before the breath or after it. Cutting before the breath and taking a fresh one usually sounds most natural.
Look as well as listen. Zoom in on the waveform. The gaps between phrases show up as flat sections, and you can see where one sentence finishes and the next begins. Click in the flat part, then check by ear.
Matching the take you’re joining
A technically perfect join can still stick out if the new audio sounds different from the old. Listeners won’t know why, they’ll just feel a bump.
For audiobook narrators this isn’t optional. ACX’s audio submission requirements say: “Your audiobook should be consistent in sound and formatting. This includes audio levels, tone, noise level, spacing, and pronunciation.” A patch that’s a touch louder, a little closer to the mic, or slightly brighter in tone breaks that, even if the words are right.
A few habits keep your joins matched:
- Don’t move between takes. If you lean back to check the script after a fluff, come back to exactly the same spot. A small change in mic distance changes both level and tone. A mark on the desk or a light touch of your chin to the same position helps.
- Match the energy, not the mood you’re in now. You might be annoyed at yourself for the fluff. The character isn’t. Let the pre-roll pull you back into where the story was.
- Keep the room the same. If the heating clicks on between takes, wait for it. A change in background noise at the join is easy to hear on headphones.
- Watch for mouth noise at the cut. The first sound after you start speaking is where clicks love to hide. A sip of water and the tricks in our guide to stopping clicks and smacks make a real difference here.
ACX is just as clear about the other side of it: “Make sure each file is free of extra sounds like plosives, microphone pops, mouse clicks, excessive mouth noise, and outtakes.” Punch and roll is one of the easiest ways to keep outtakes out of a file in the first place, because the bad take never survives the session.
© The Voice Realm
When to stop rolling and patch separately
Punch and roll is for the moment. It isn’t the right tool for everything.
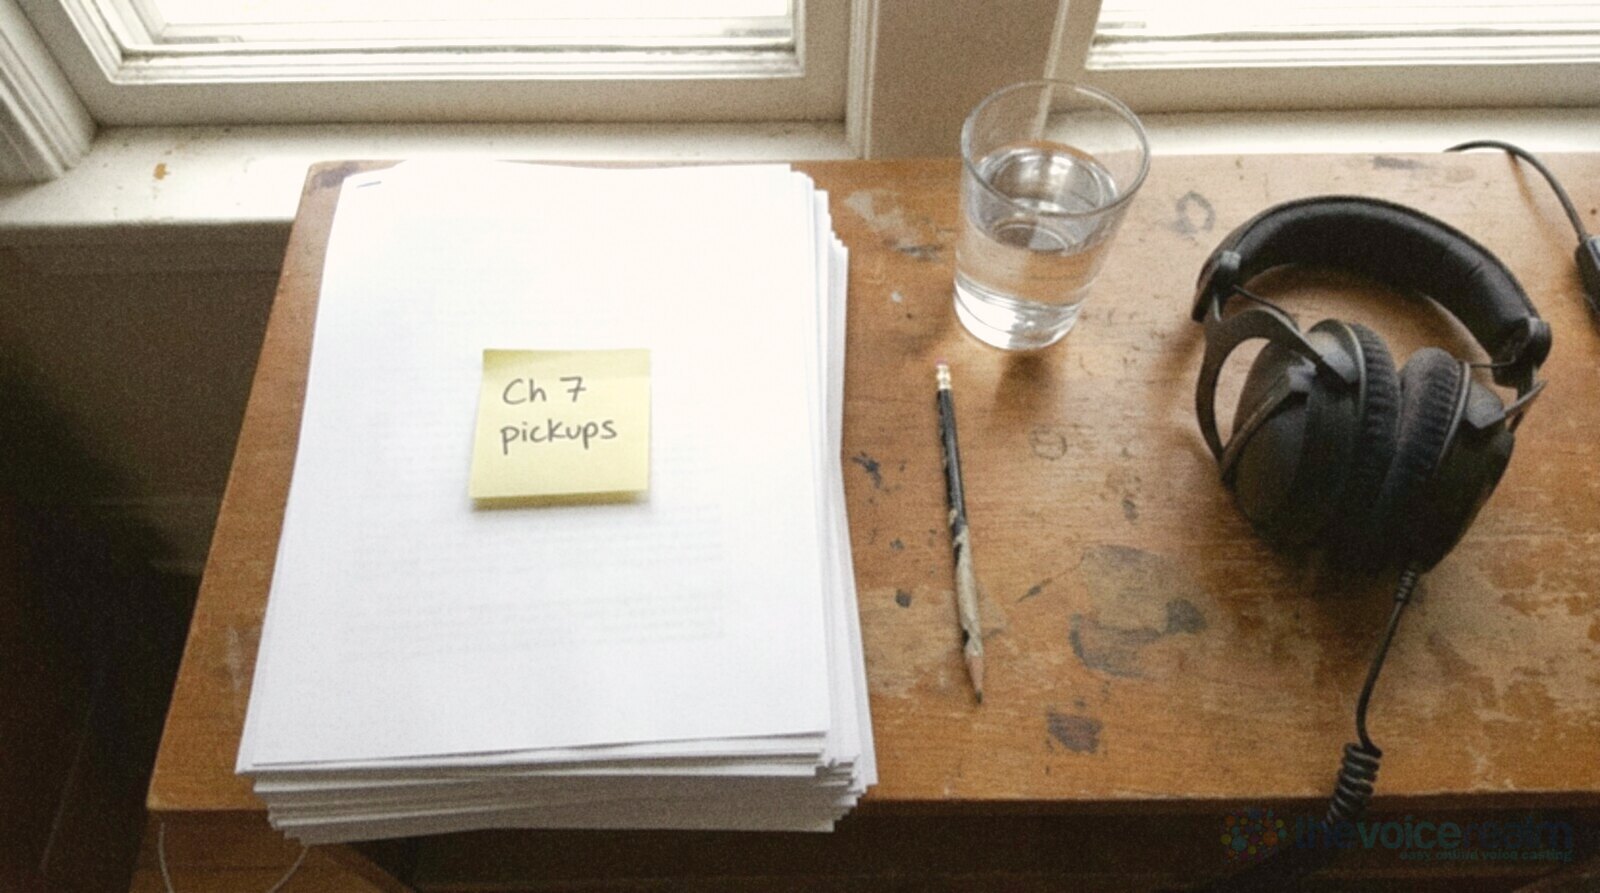
When a producer sends notes days later, the classic pickup session, you’re patching a finished file rather than continuing a live one. Punch and roll would wipe everything after the cut point, which is exactly what you don’t want. For that, record the fix on its own, then drop it into place. The Audacity manual has a separate punch-in repair tutorial for this, and it starts with advice worth following on every job: “Always make a safety backup copy of a recording by exporting it as WAV or FLAC, immediately after you stop the recording, before you work on the punch-in.”
The same goes for a whole paragraph you want to read differently. If you’ve finished a chapter and decide a passage needs a new approach, re-record it as its own take and edit it in. Punching in at the start of the paragraph would throw away the rest of the chapter.
One more thing to know. The crossfade means “the original bad take is not completely deleted, but a tiny portion of it is blended with the new take, so that the waveform has no discontinuities,” as the manual puts it. On a ten millisecond fade that’s inaudible, but it’s why you should always cut in silence. A fade across the end of a fluffed consonant can leave the faintest ghost of it behind.
If you’re narrating long-form work, getting comfortable with this is part of the day-to-day craft of audiobook narration, where pickups and patches are part of every project.
© The Voice Realm
A ten minute drill to make it automatic
Like any studio skill, it only becomes useful once your hands do it without thinking. Try this once a day for a week.
Pick a page of something dense, a news article or a terms and conditions page will do. Read it aloud and record, and every time you make a mistake, however small, punch and roll. Don’t let a single one through. At the end, listen back on headphones with your eyes closed and try to spot the joins.
The first day you’ll hear most of them. By the end of the week, you’ll be hunting for them and missing a few. That’s when it’s ready for real work. Then take it to a real brief: the voice over jobs board is full of long-form scripts where a clean, steady read is the whole job.
Sources: “Punch and Roll Record”, Audacity Manual; “Tutorial: Punch-in repair of recordings”, Audacity Manual; “ACX Audio Submission Requirements”, ACX Help Center.
Ready to get booked?
See the jobs open right nowAbout Sarah Robbins
Sarah Robbins writes for The Voice Realm about finding voice over work, home studios, casting and the business side of voice acting.