Blog
Blog

You’ve nailed the read. The client loved the audition, the session went smoothly, and now there’s one last job between you and an invoice: sending the file. This is where a surprising number of good voice actors trip up, with a file that’s too quiet, too loud, the wrong format or named “final_FINAL2.wav”. This guide is for anyone recording at home who wants to send audio a producer can drop straight into a project without a second thought.
We’ll go through the numbers you’ll see on every spec sheet, what they actually mean, the loudness each kind of destination expects, and a quick check to run before anything leaves your computer.
The default that’s almost never wrong
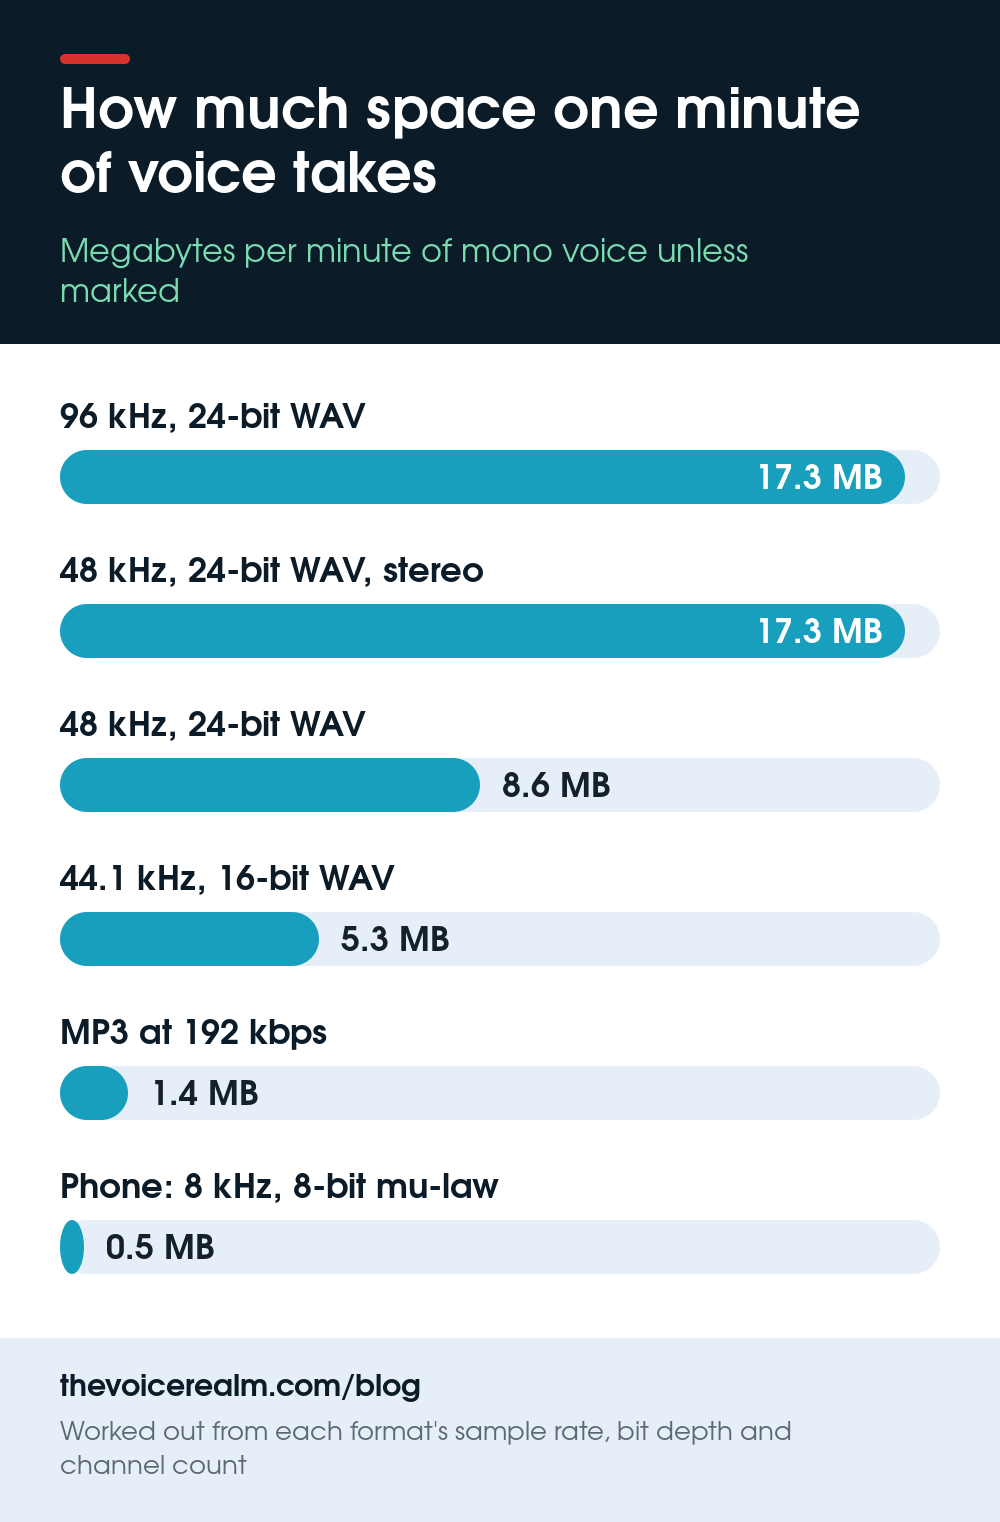
If a client gives you no instructions at all, send a 48 kHz, 24-bit, mono WAV file. That’s the safe house setting for almost all voice over work, from commercials to e-learning to explainer videos.
Here’s why each part earns its place. 48 kHz is the sample rate video runs on, so anything headed for a screen drops in without being converted. 24-bit gives the editor plenty of room to raise or lower your level without adding noise. Mono is right because you’re one voice from one microphone; a stereo file of a mono voice is just the same signal twice, doubling the size for nothing.
And WAV, because it’s uncompressed. Nothing has been thrown away, so the editor gets exactly what your microphone heard.
Record at that setting from the start, too. Set your recording software’s project to 48 kHz and 24-bit before you press record, and you’ll never have to convert later. Converting isn’t a disaster, but every conversion is one more place for something to go quietly wrong.
Sample rate and bit depth, without the maths lecture
Sample rate is how many times per second the sound is measured. At 48 kHz that’s 48,000 snapshots a second, more than enough to capture everything a human voice does. The other common rate is 44.1 kHz, the old CD standard, still used in music and in some audiobook and podcast work.
Bit depth is how finely each of those snapshots is measured. 16-bit is fine for a finished file a listener hears. 24-bit is better for a file someone will still edit, because it keeps far more detail in the quiet parts, which matters when an editor lifts a soft line or adds compression.
You’ll occasionally see 96 kHz requested. It won’t hurt, but it doubles the file size and a voice doesn’t gain anything a listener can hear. Send it if it’s asked for; don’t volunteer it.
The one time you’ll go much lower is phone systems, which run at 8 kHz. That’s a world of its own, with its own rules for how you read and deliver, so treat it as a separate job rather than a setting you change at the end.
© The Voice Realm
WAV, MP3 or something else?
WAV is the working format. MP3 is a delivery format. The difference is that MP3 makes the file small by throwing away detail the encoder decides you won’t miss, and once it’s gone, it’s gone. If an editor then processes that MP3 and saves it again, the losses stack up.
So send WAV unless a client specifically asks for MP3. When they do, they’ll usually tell you the setting. Audiobooks are the best known example: the ACX submission requirements ask for files at “192 kbps or higher CBR, 44.1kHz MP3”. CBR means constant bit rate, which some platforms insist on because variable bit rate files can report the wrong length.
For auditions, a decent MP3 is often what the casting form wants, and that’s fine because nobody is going to edit it. Keep the WAV master of everything you record, though. A client who loved the audition may ask for the full quality file of that exact take.
AIFF is Apple’s cousin of WAV and works the same way. FLAC is a lossless compressed format, smaller than WAV with nothing thrown away, and a few podcast and music platforms accept it. Neither comes up often in voice over, but now you’ll know what they are when they do.
Peaks, RMS and LUFS: three ways of saying how loud
This is the part that confuses people, mostly because there are three different measurements and spec sheets mix them freely.
Peak is the single loudest instant in the file. Your editor’s meter shows it in dBFS, decibels below full scale, where 0 is the ceiling and anything that hits it distorts. A peak of -3 dB means the loudest moment sits three decibels under that ceiling.
RMS is an average of the level over time, closer to how loud the file feels. ACX uses it, which is why audiobook narrators talk about RMS while almost nobody else does.
LUFS (also written LKFS; they’re the same scale) is loudness measured the way ears hear it, weighted towards the frequencies we’re most sensitive to and averaged over the whole piece. It’s what broadcasters and streaming platforms use. A higher number, closer to zero, is louder: -16 LUFS is louder than -23 LUFS.
- Peak is a ceiling. It tells you nothing about how loud the file feels, only how close the loudest moment comes to distorting.
- RMS and LUFS are averages. Two files with identical peaks can sound very different in loudness.
- True peak is stricter than peak. It catches overs that happen between samples once a file is converted, so keep a little extra headroom.
- Don’t chase a number on raw files. Loudness targets apply to finished audio. Many clients want your raw, unprocessed read so they can mix it themselves.
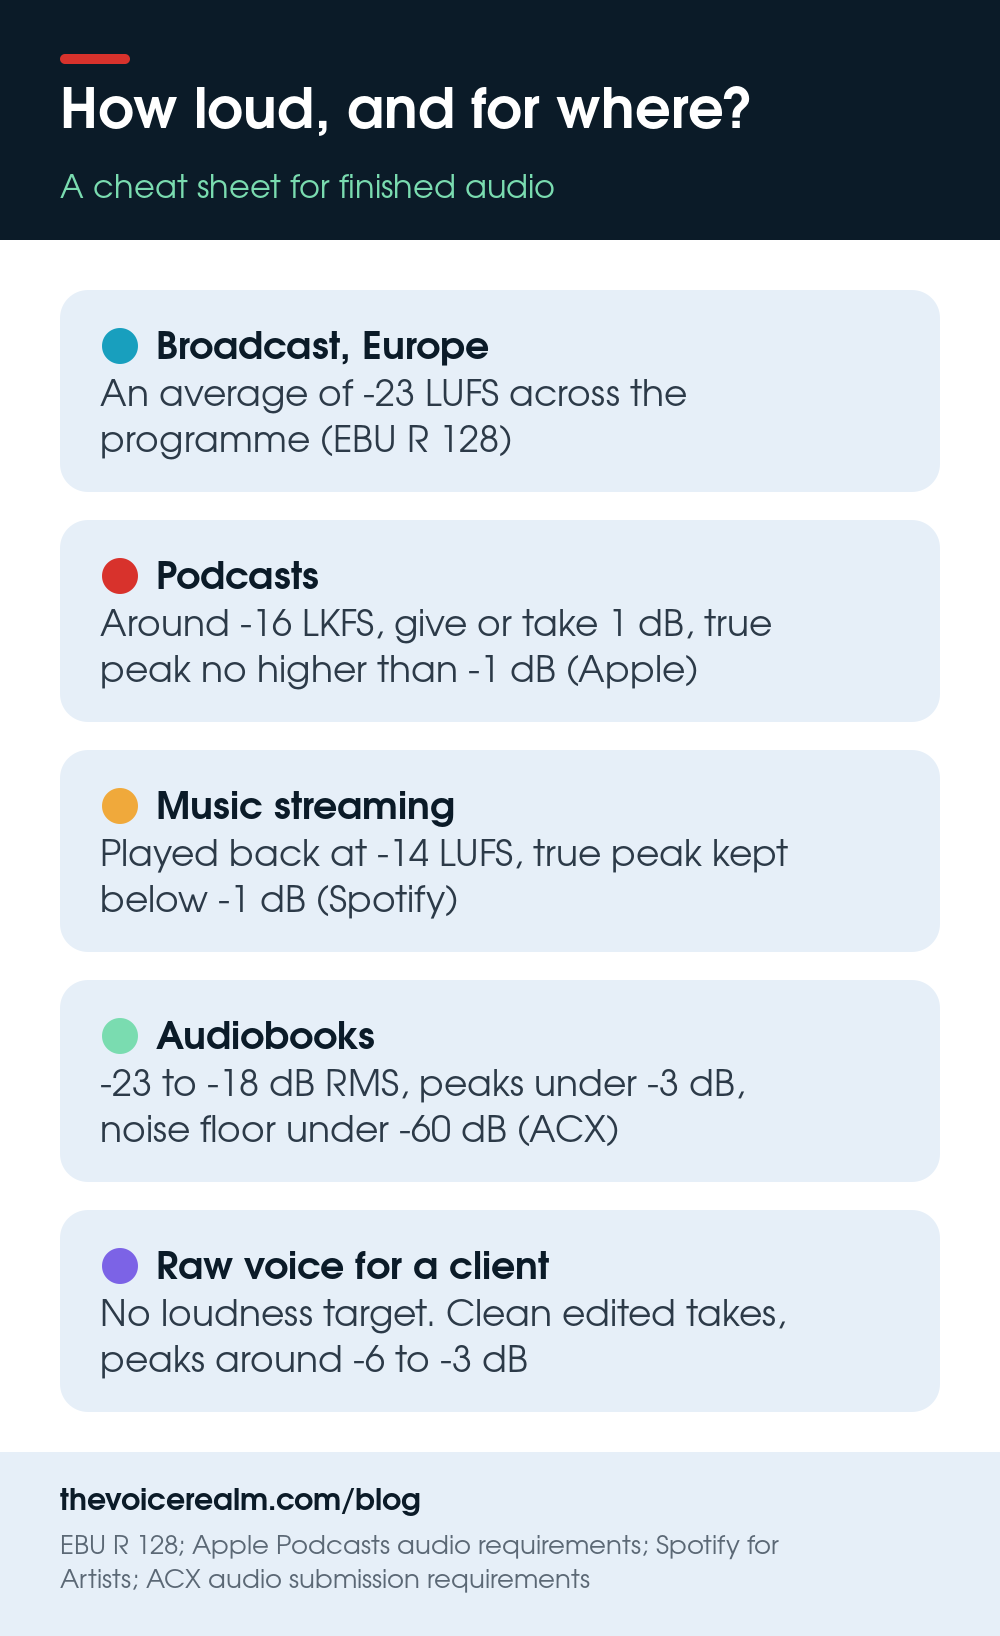
That last point matters. If a client asks for “raw” or “dry” audio, they mean no compression, no limiting, no loudness target, just clean edited takes at a healthy level. Peaks somewhere around -6 to -3 dB are a comfortable place for raw voice.
Every destination wants a different loudness
Here’s where it gets interesting. Different places your voice ends up have each settled on their own loudness, and they don’t agree.
European broadcasters follow EBU R 128, which the European Broadcasting Union describes as a “recommendation to use an average programme loudness of -23 LUFS and the ‘Loudness Range’ and ‘Maximum True Peak Level’ descriptors.” That’s quiet compared with most things on your phone, on purpose: it leaves room for drama and stops adverts blasting louder than the programme.
Podcasts run hotter. Apple’s audio requirements for Apple Podcasts ask that “the overall loudness remains around -16 dB LKFS, with a +/- 1 dB tolerance” and that “the true-peak value doesn’t exceed -1 dB FS”.
Music streaming is louder again. Spotify’s guidance for artists says it adjusts tracks “to -14 dB LUFS, according to the ITU 1770 standard,” and recommends you keep the master “below -1dB TP (True Peak) max.”
Audiobooks on ACX use the older RMS measure: “Volume is between -23dB and -18dB RMS”, “Peak levels are less than -3dB” and “Noise floor is less than -60dB RMS”.
You’ll rarely need to hit any of these yourself, because a producer or mix engineer usually handles final loudness. But when a client says “podcast ready” or “broadcast spec”, now you’ll know which number they mean, and you can ask the right follow-up question instead of guessing.

© The Voice Realm
Noise floor and room tone
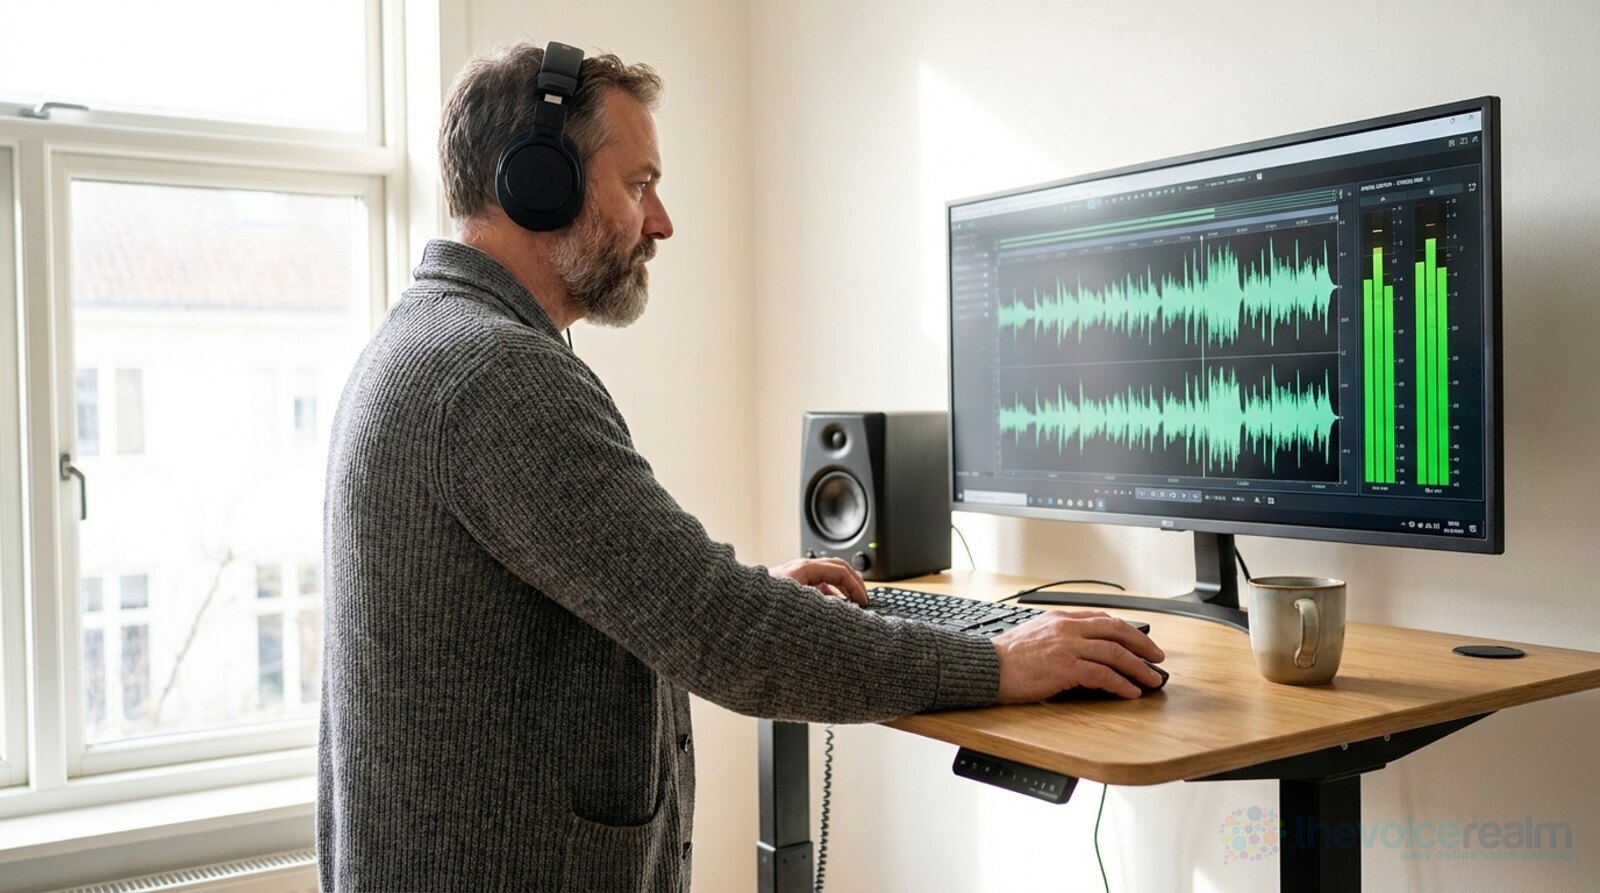
The noise floor is the level of everything in your recording that isn’t you: the fridge, the computer fan, the traffic, the hum of your interface. Record ten seconds of silence in your booth, look at the meter, and that’s your number. ACX’s -60 dB line is a good target for every kind of work, not just audiobooks.
 VOICEMASTERACADEMYTwenty modules, one at a time.Breath controlHome studioCommercial techniqueAuditionsStart module oneNo experience needed.
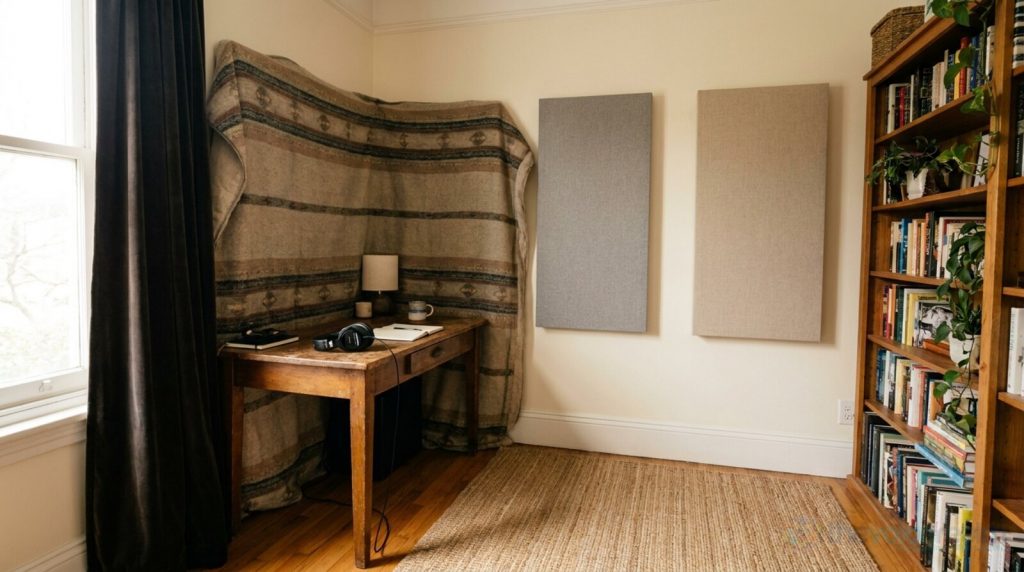
If you’re above it, no amount of software will save you completely. Noise reduction plug-ins help a little and then start to make your voice sound underwater. The fix is in the room, and we’ve written about the order to do it in, starting with treating the wall behind you. Measure first with the free Home Studio Analysis from Voice Edit Suite, treat, then measure again so you know it worked.
Room tone is a few seconds of that silence at the start and end of a file. ACX asks for “between 1 and 5 seconds of room tone at the beginning and end of each file”, and plenty of editors appreciate a second or two even when they don’t ask, because it gives them something real to fill gaps with. What they don’t want is a digital silence that cuts to nothing; it sounds like the line went dead.
© The Voice Realm
Name your files like someone else has to find them
Because someone else does. A producer might be juggling forty files from six actors at midnight before a deadline. A clear name is a small kindness that makes you memorable for the right reasons.
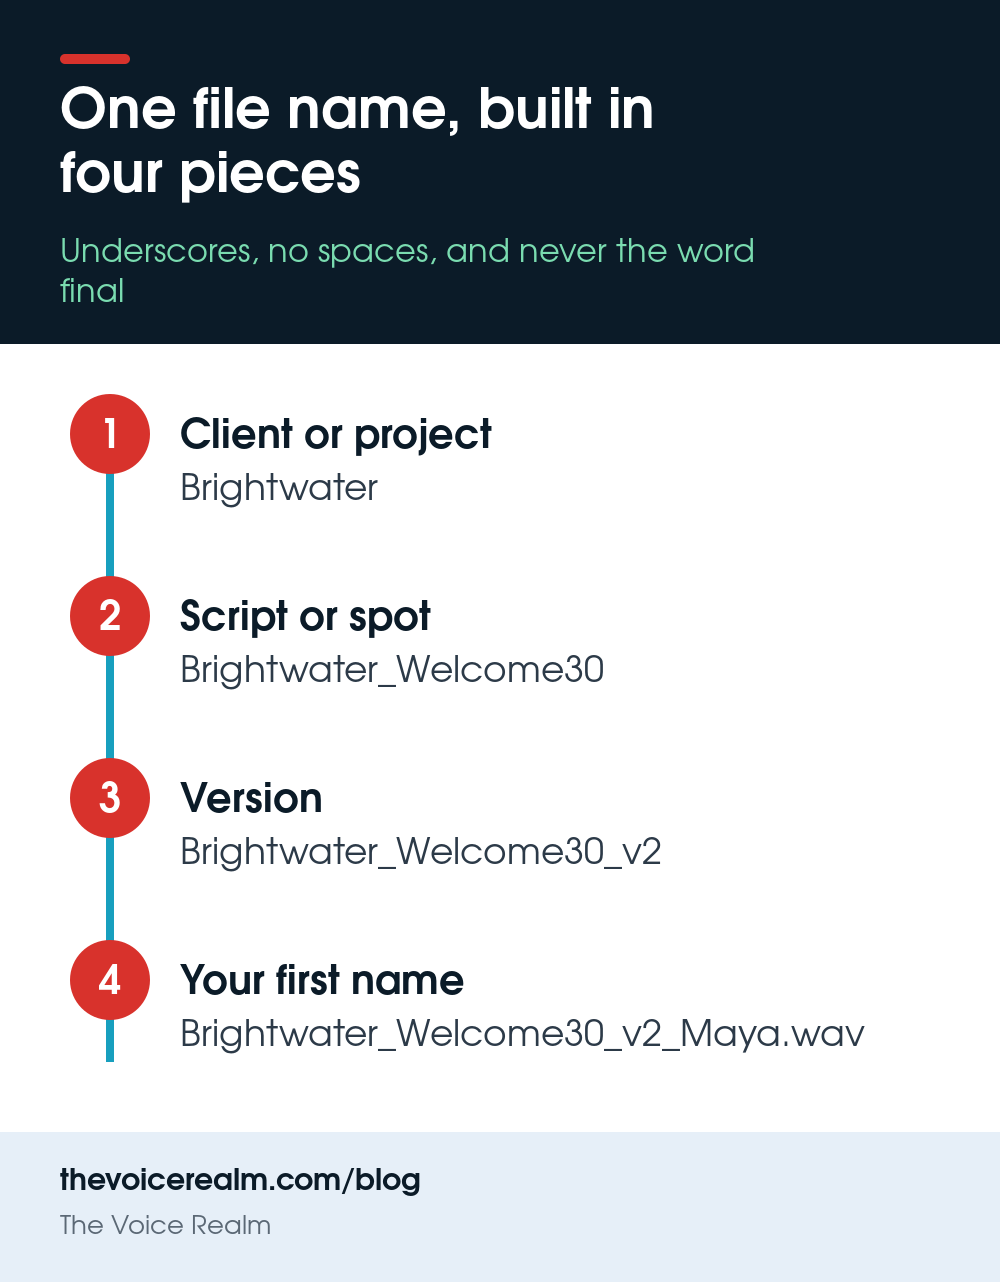
The pattern that works is client or project first, then the script or spot, then the version, then your first name, with underscores instead of spaces, because some systems mangle spaces in file names. Never “final” in a file name. There’s always another final.
If the client sends a script with line numbers or file names already on it, use theirs exactly, character for character. That’s especially true on e-learning and game work, where files are loaded by name and a single wrong letter means a silent slide. The e-learning side of the business lives and dies by this.
For delivery, put everything in one folder, zip it, and send a link from a file sharing service rather than attaching large WAVs to an email. Write one line in the message saying what’s in the folder and the format, so they know without opening it.
© The Voice Realm
When the client sends a spec, theirs wins
Everything above is a sensible default. The moment a client sends their own spec, follow it to the letter, even if it looks odd. A video team might want 48 kHz stereo because their template expects two channels. A game studio might want a very specific peak level on every line so their engine can treat them all the same.
If a spec is unclear, ask before you record, not after. A short question such as “Would you like these raw, or processed to a loudness target?” or “Is that 48 kHz, 24-bit WAV?” shows you know what you’re doing. Nobody has ever lost a job for asking a sensible technical question.
Keep a note of what each regular client wants. The second job for the same client should arrive in exactly the same shape as the first, without them having to repeat themselves. That kind of consistency gets you rebooked, and if you’re editing your own takes, it’s simple to save an export preset per client.
© The Voice Realm
A two-minute check before you hit send
Before anything leaves your computer, open the exported file, not the project, and listen to the start, the end and one spot in the middle on headphones. Exports can clip the first word, add a stray click at the end, or come out at a different sample rate than you expected.
Then check the file properties against the spec, look at the peak meter, and play a few seconds on your phone speaker. If it sounds clear and even on that tiny speaker, it’ll be fine on almost anything.
Finally, save a copy of exactly what you sent, in a folder with the date. When a client comes back months later asking for a pickup to match, you’ll have the file, the settings and the sound all in one place, and that pickup will be the easiest job you do all week.
Sources: “EBU R 128”, European Broadcasting Union; “Audio requirements”, Apple Podcasts for Creators; “Loudness normalization”, Spotify for Artists; “ACX Audio Submission Requirements”, ACX.
Ready to get booked?
See the jobs open right nowAbout Sarah Robbins
Sarah Robbins writes for The Voice Realm about finding voice over work, home studios, casting and the business side of voice acting.